Our Team
We are a team of four Mechanical Engineering students with a passion for the creative side of engineering.
You can find out more about each of us and what interested us in this project below.

Deven Frauenhofer
manufacturing lead
When I was young, my desire to entertain a crowd drove me to take part in a few plays throughout elementary and junior high school. Then, in high school I applied my interest in visual arts to film-making. Even though I chose to major in engineering, I still have passion in the creative/visual arts field which drove me to choosing this as my senior project.
Zoe Riesen
Project Manager
I was eager to study engineering at Cal Poly because, to me, it provides the perfect blend of scientific knowledge and creativity. I have always thought of myself as an artist and as such I spend a significant amount of my free time drawing and painting. This project was the perfect opportunity to synthesize engineering and art. A few of my other interests include hiking, camping, rock climbing, cooking, and learning about wine.

Taylor Chavez
prototyping lead
Outside of engineering, I cook high quality meals and appreciate film as hobbies. Because of this, I have developed a better sense for the little details that make a dish or film scene so remarkable! I am also one to throw myself out of my comfort zone, which helps me learn about, discover, and appreciate new things. I feel the artistic aspect of this senior project provided exactly that: a different and unique challenge that most of us mechanical engineers have yet to face.

Andrew Nott
design lead
If I wasn’t a mechanical engineer, I would be an architect. I love the idea of designing physical structures for human interaction and appreciation. I’ve always leaned into the creative side of engineering, which is why this project interested me. I spend too much time at the craft center, I love drawing, I play Dungeons and Dragons, and aesthetics seem like an integral part of any project. Adam Savage of MythBusters is a big inspiration for me, and he started out in prop design.
Acknowledgements
We want to extend a special thank you to our sponsor, Dr. Barata, for giving us the opportunity to make this interdisciplinary project come to life. He gave us the perfect mix of direction, creative freedom, encouragement, and enthusiasm throughout this entire project, even after the pandemic hit.
We would also like to thank our faculty advisor, Sarah Harding, for her invaluable advice and support from start to finish. She taught us several design, selection, and management techniques that allowed our project to proceed as smoothly as it did. She was essential to the breakthrough in our pilot seat design.
Of course, none of this would be possible without Cal Poly, the ME department, and the Music department providing the opportunity to Learn by Doing, or the Baker Koob endowment giving us the funding necessary to make our design come to fruition.
Finally, thank you for visiting this website, checking out our videos, and exploring our guide on Instructables!
Our Project Videos
Our Project's Digital Poster
Problem Statement
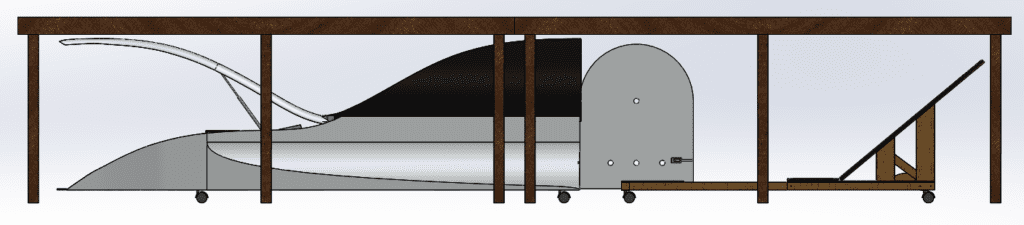
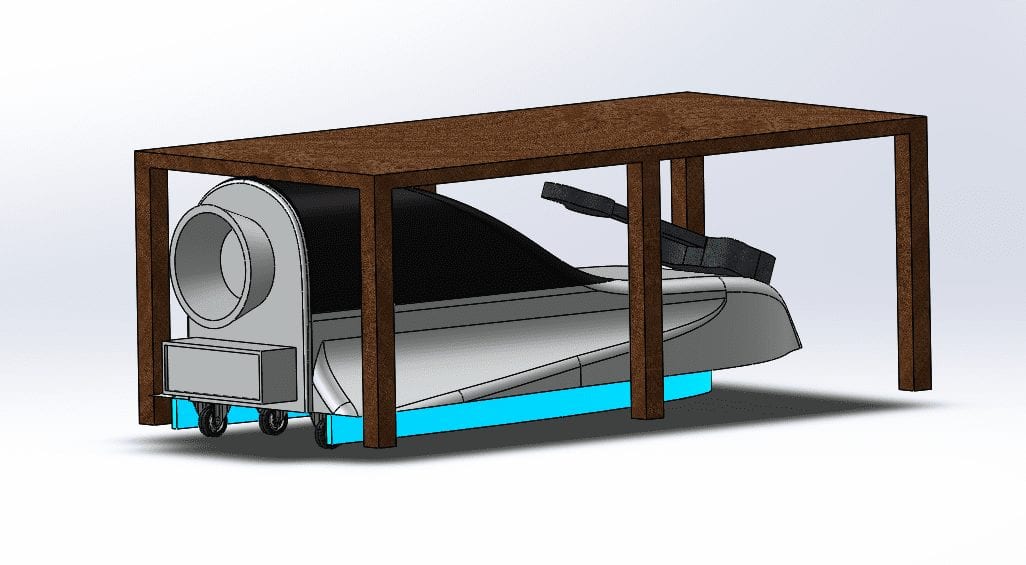
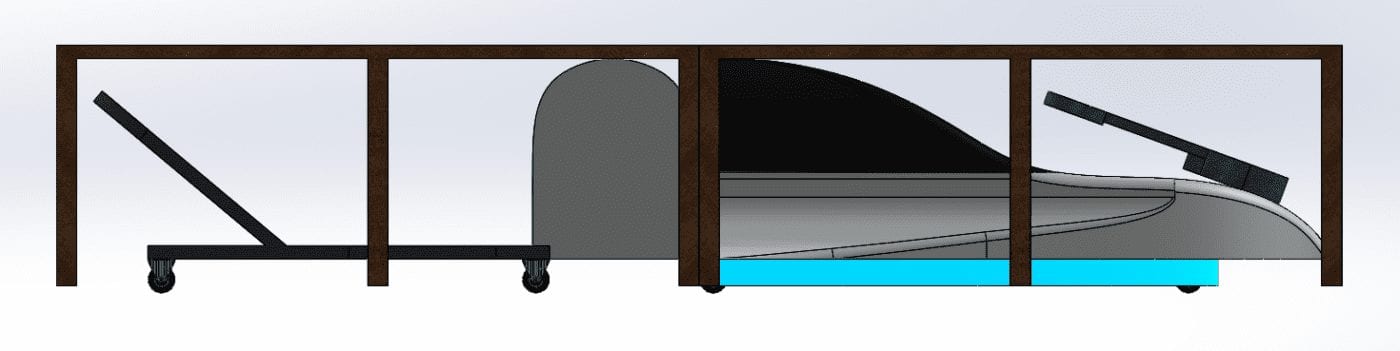
This spaceship prop must emerge from a tight space under the stage in a sleek and silent manner to maximize the surprise and awe from the audience. Special effects will reinforce this awe factor. The key is reliability: if this prop snags or fails during one of the five performances, the climax will be ruined. Structurally, the prop must be able to hold an adult male. He must be able to get in while the prop is under the stage, exit in the case of an emergency, and exit the prop elegantly once it has emerged.
Design Constraints
- Exterior dimensions less than 16′ x 42″ x 32.5″ (L x W x H) in order to allow the prop to fit under the stage section.
- Internal dimensions greater than 5’10” x 2’ x 1’ to accommodate the actor.
- Pilot seat should not deflect more than 1″ under a 150 lb load.
- The spaceship must deploy quietly between scenes, making less than 40 dB of noise.
- The prop must allow for a foolproof quick exit, even beneath the stage, in an emergency.
- The prop must be able to roll out between scenes in a matter of seconds.
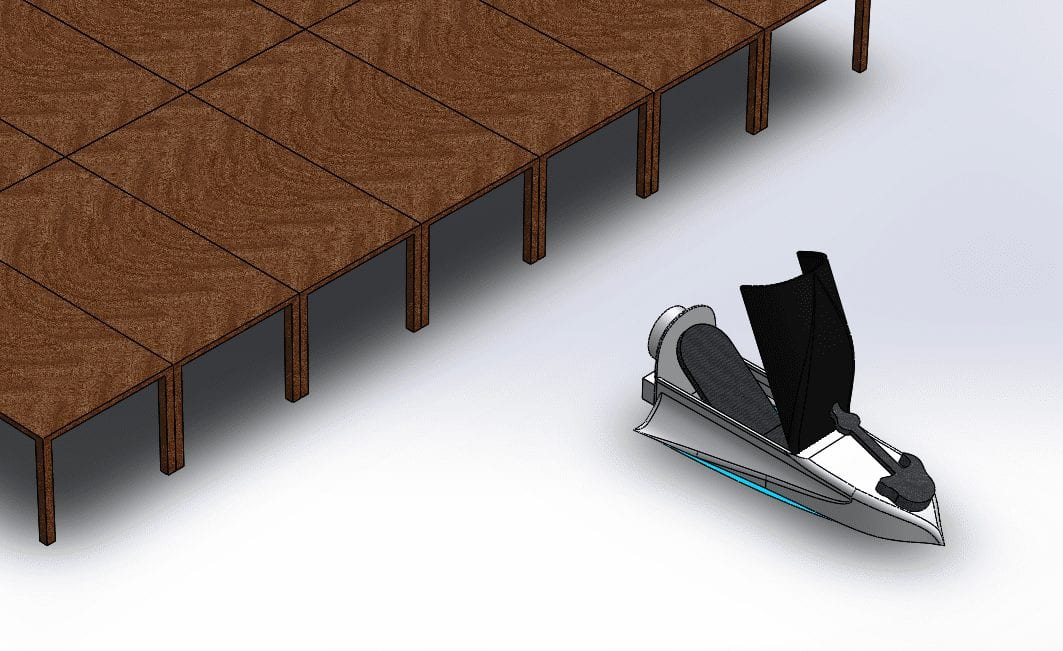
- The mechanisms must deploy reliably, dramatically, and quickly in full view.
- The prop can not snag on the stage during deployment.
- The shell should be aesthetically pleasing.
- The roof should not deflect more than an inch under a 20 lb load.

Cal poly - rsvp spaceship prop
This project was sponsored by Dr. Barata
and the Cal Poly Music Department.
Instructables Guide
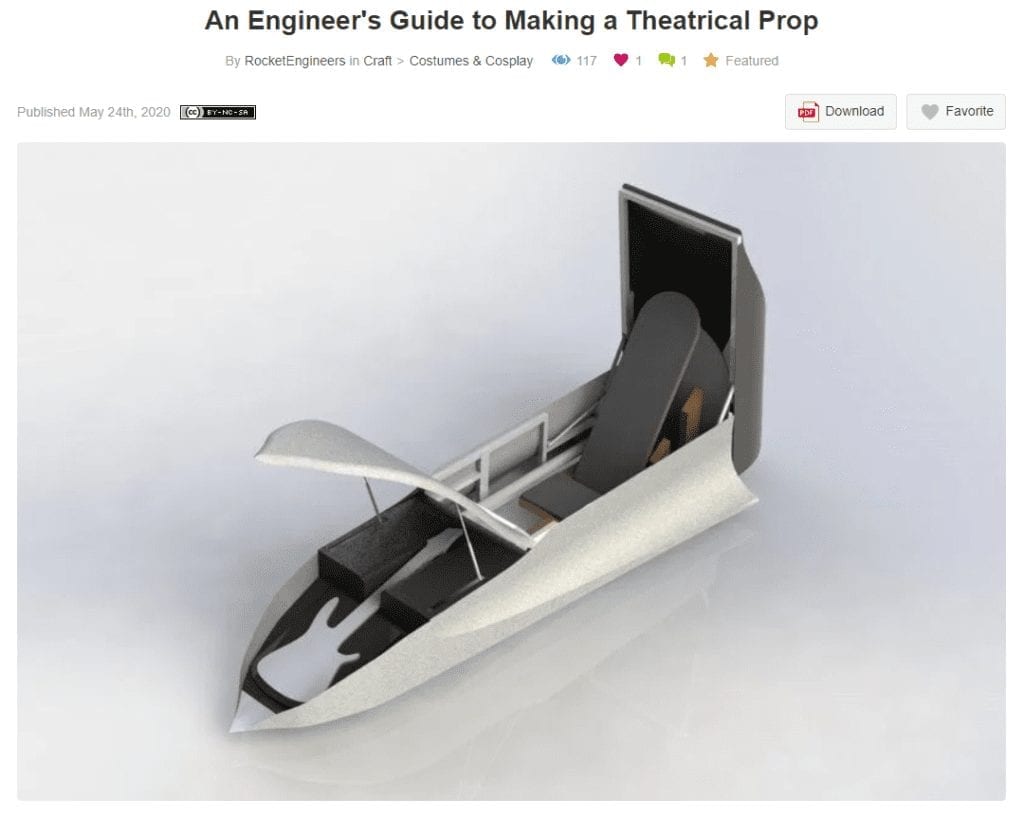
When our project was canceled because of Covid-19, we made “An Engineer’s Guide to Making a Theatrical Prop” on Instructables.com. Our goal was to make a general enough guide that future prop designers could learn from it no matter the theme of their performance. This communicates the design process, key decisions, planning, and mechanical know-how we applied to this project. You can download it from the button below.
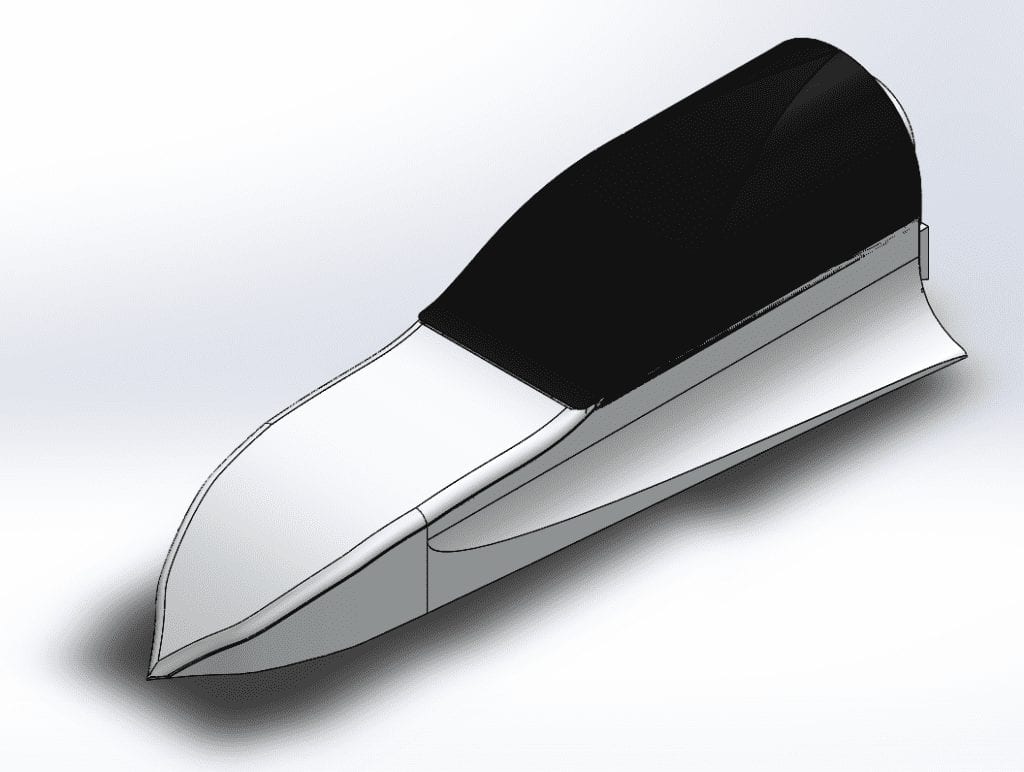
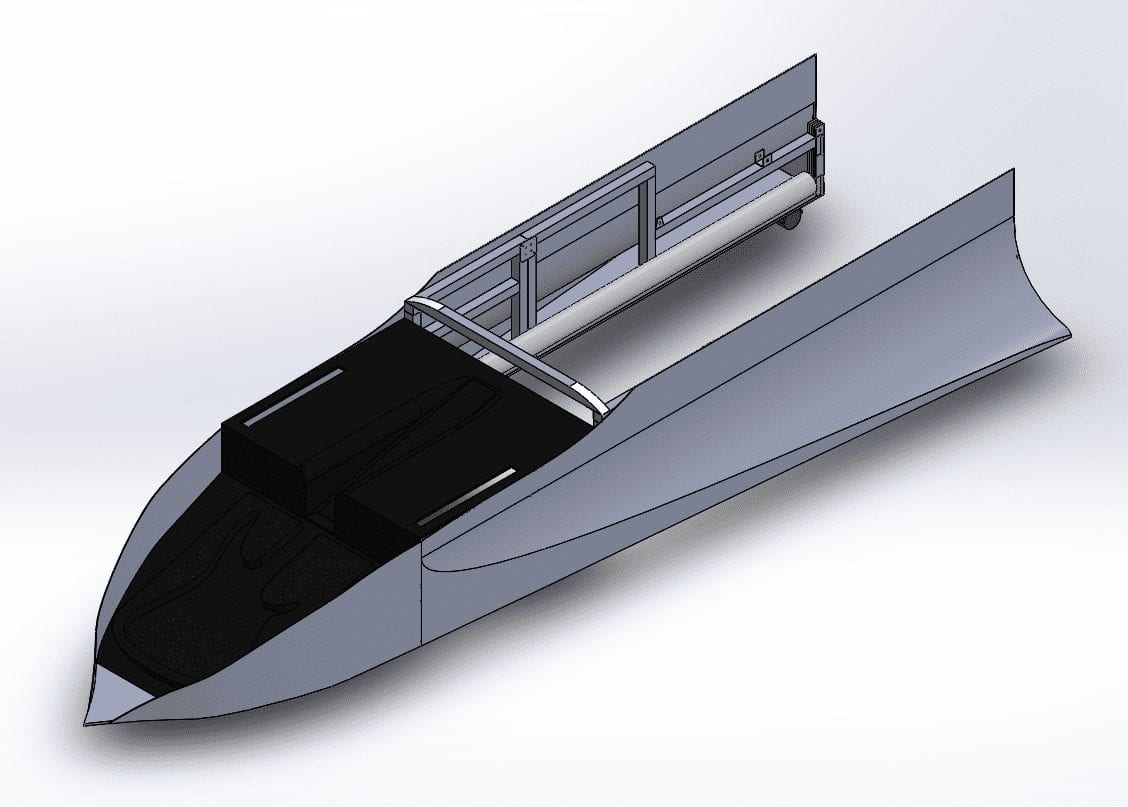
Final Design
Specifications
Dimensions – 8.5′ x 38″ x 32″
Materials – Thermoplastic, foam, aluminum strips, gas springs, fog machine, lamp shade, fasteners, and wood (2×4, 2×2, 1×1, and MDF board)
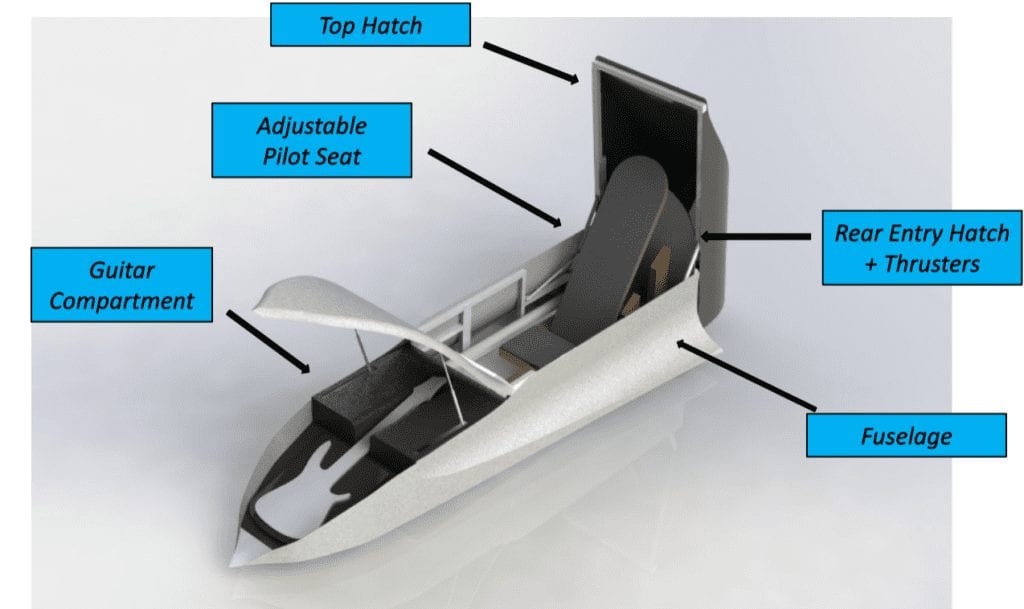
Sub-assemblies
Rolling Fuselage
Top Hatch
Guitar Compartment
Rolling Pilot Seat
Rear Hatch
Thrusters
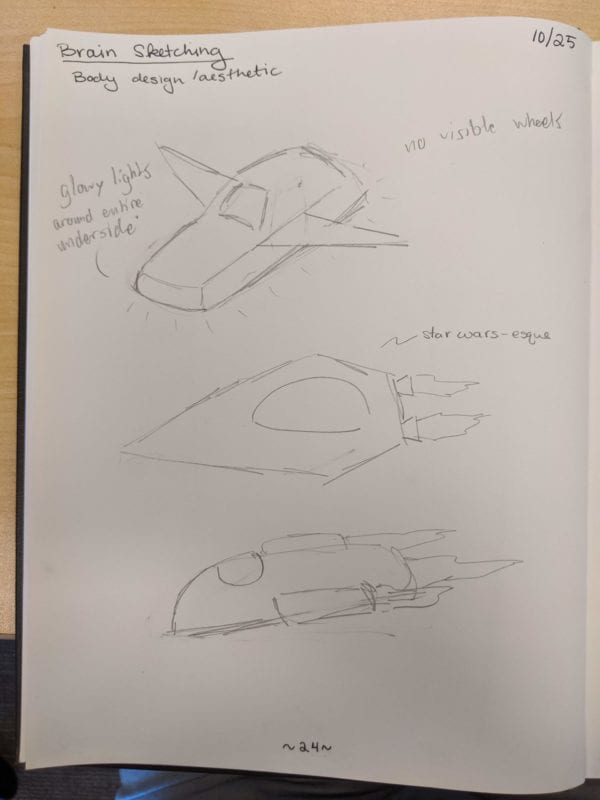
Design Process

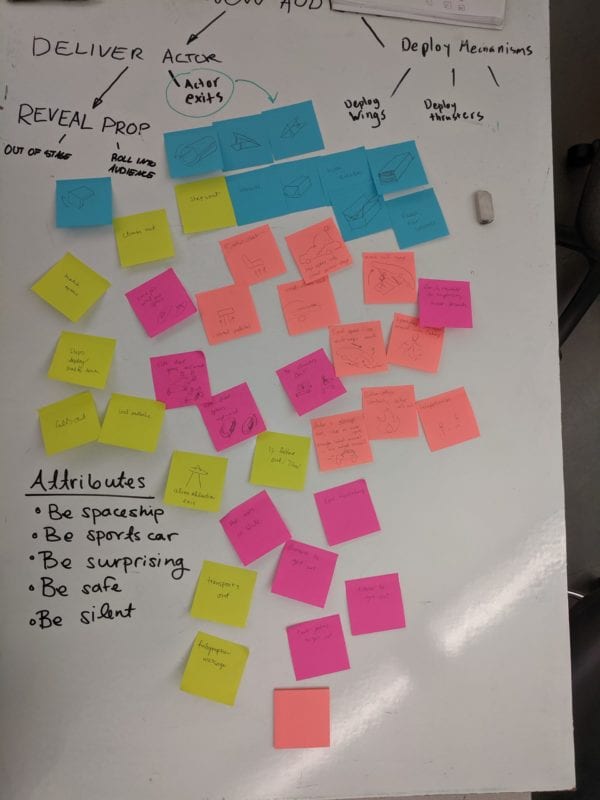
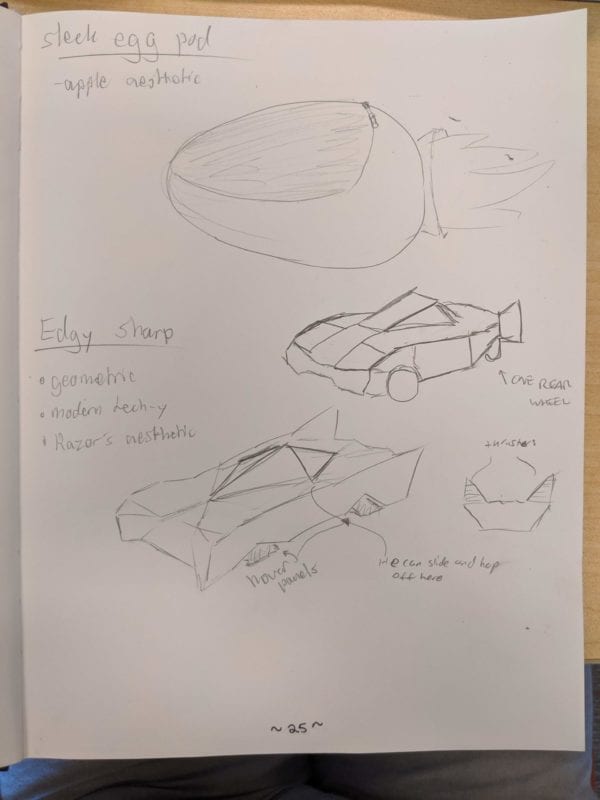
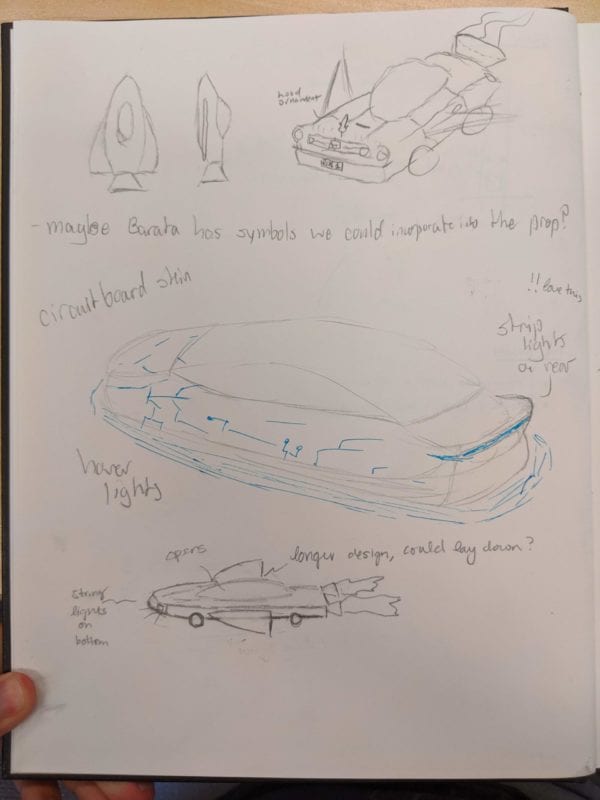
Our design process started with brainstorming functions and attributes with a whiteboard and sticky notes. After coming up with over 100 ideas, we limited our design via Pugh matrices to four functions with four ideas each. These can be seen in the morphological matrix below.
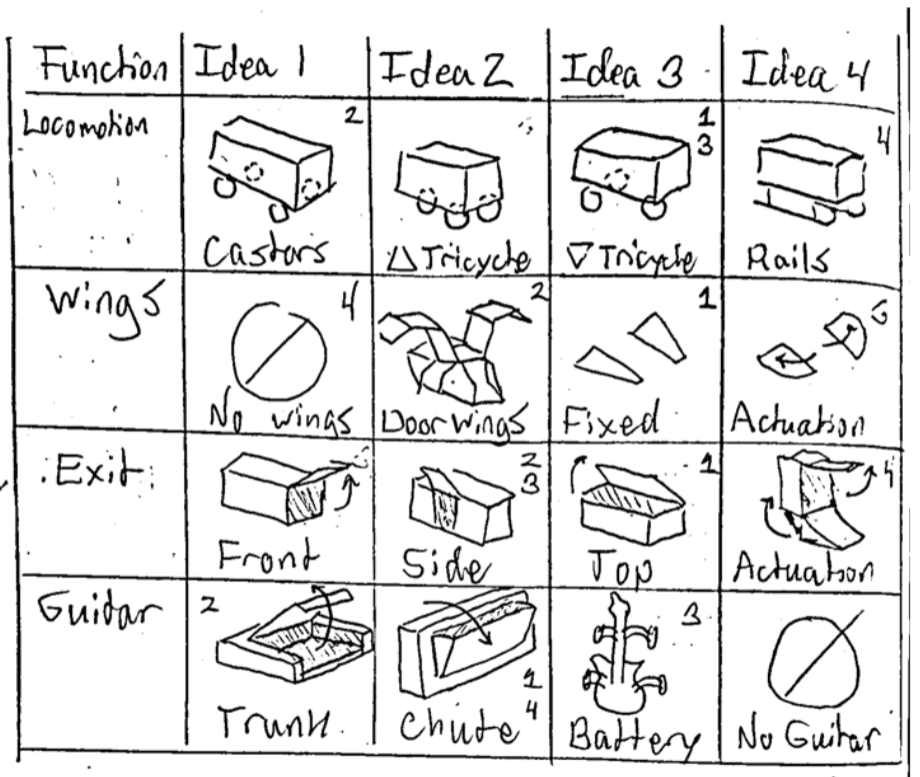
We combined these ideas in eight different logical ways to produce overall concepts. We then compared each of these concepts to the specifications derived from our problem statement and quality function deployment process.
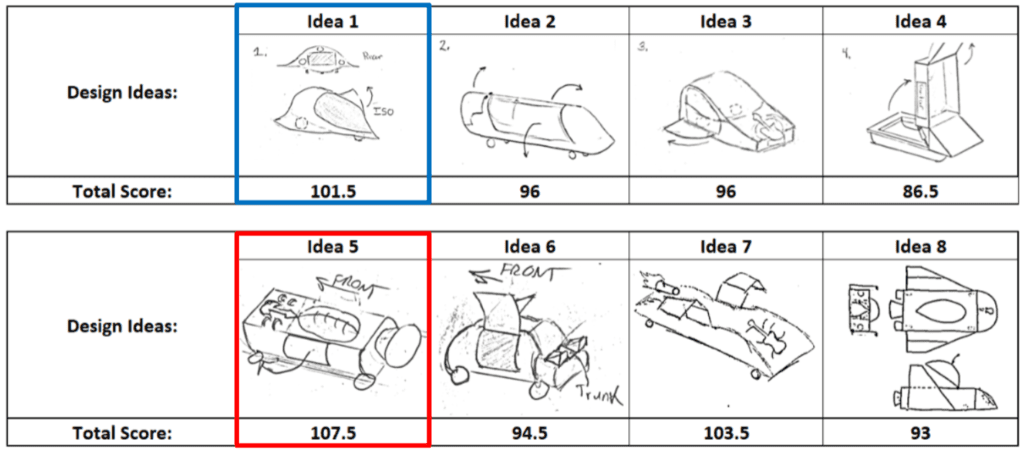
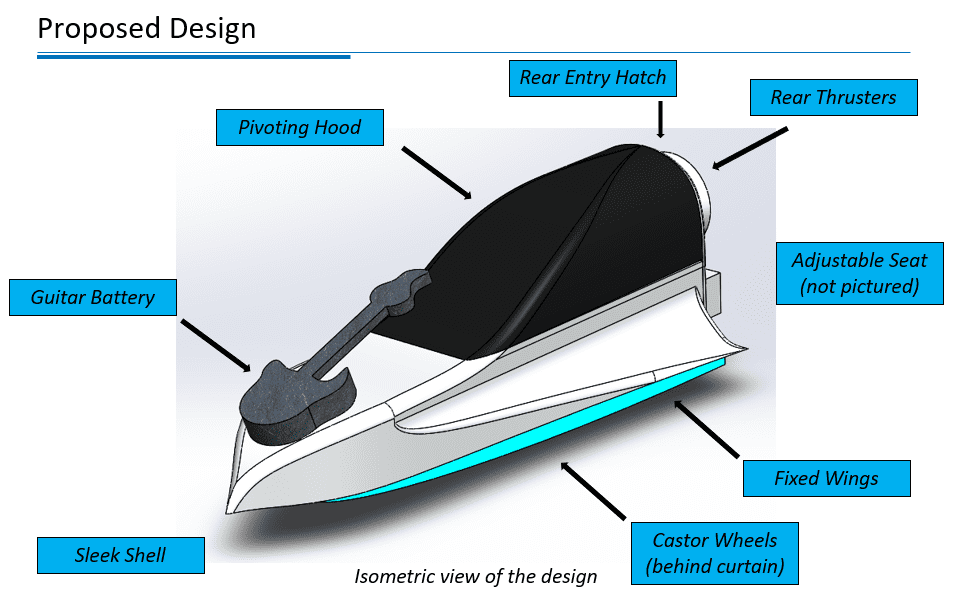
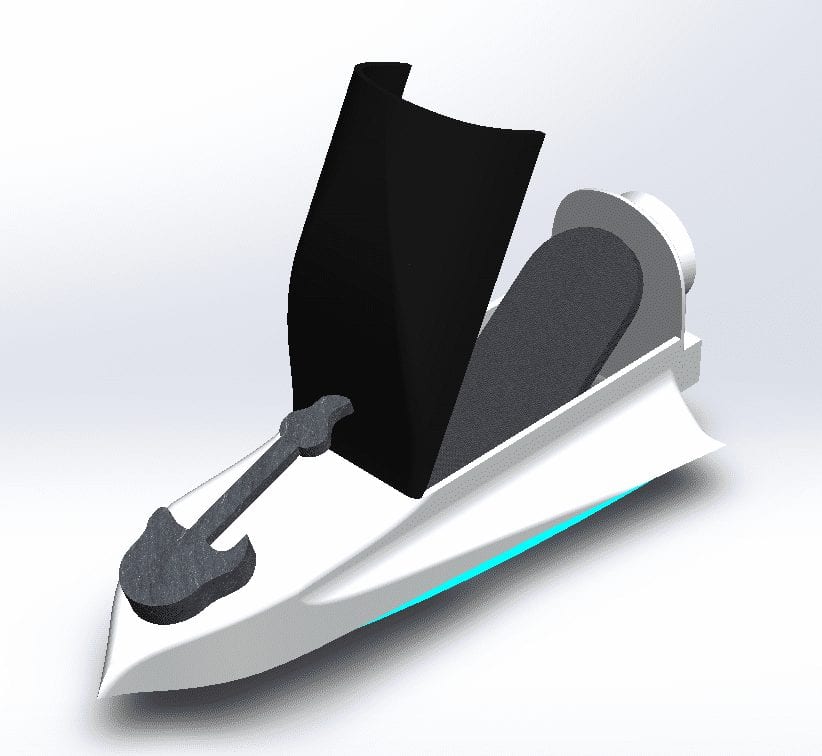
After comparing overall scores, two ideas stood out – those marked with the colored boxes above. We decided to combine them to create our preliminary design concept.
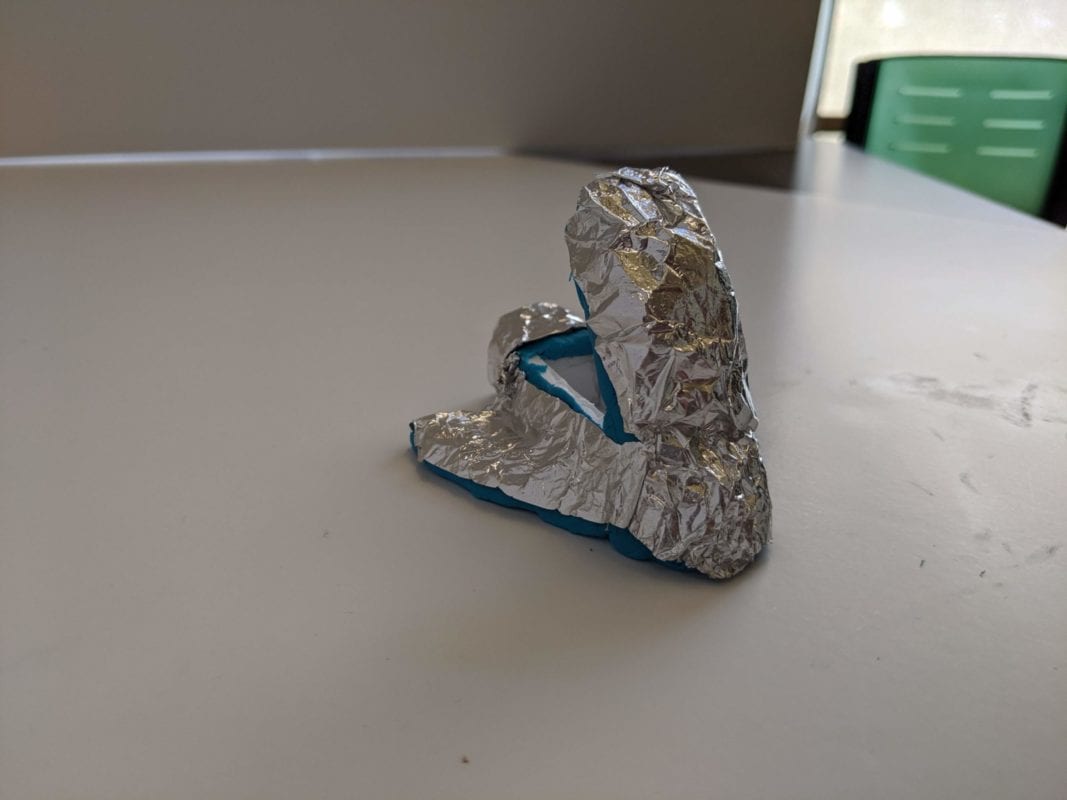
Prototyping
We prototyped extensively in the early stages of this project. Two areas concerned us: the pilot seat and thermoplastic.
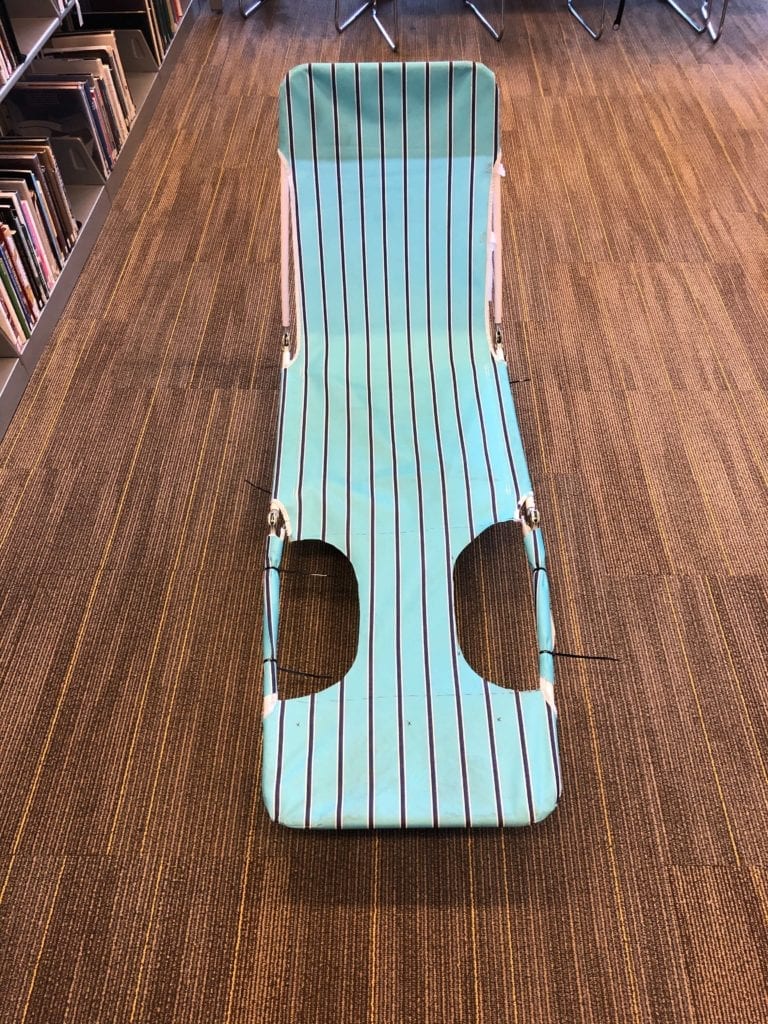
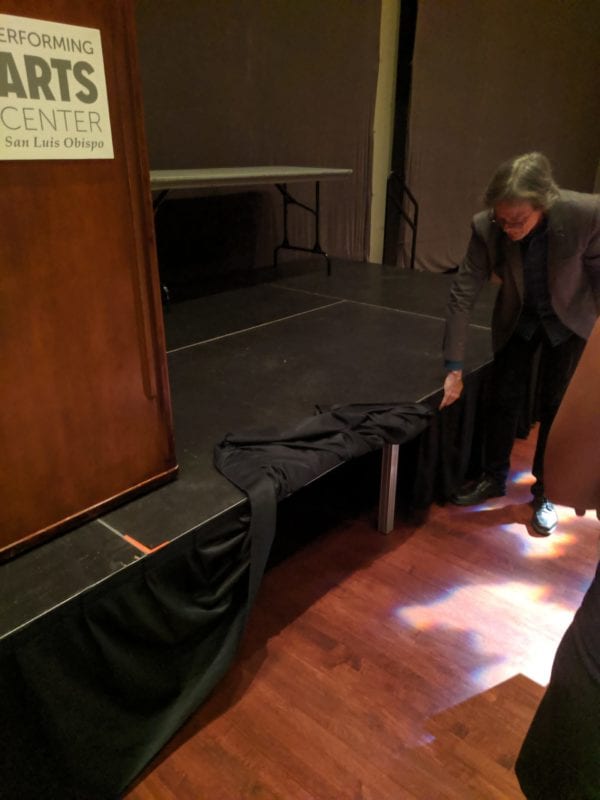
For the seat, we zip-tied a lawn chair to a rolling dolly and cut out foot holes. We found that it was easier to get up than expected, but the foot space needed to be as large as possible to avoid tripping, wheel stability was going to be essential, and having a solid handhold helped immensely.
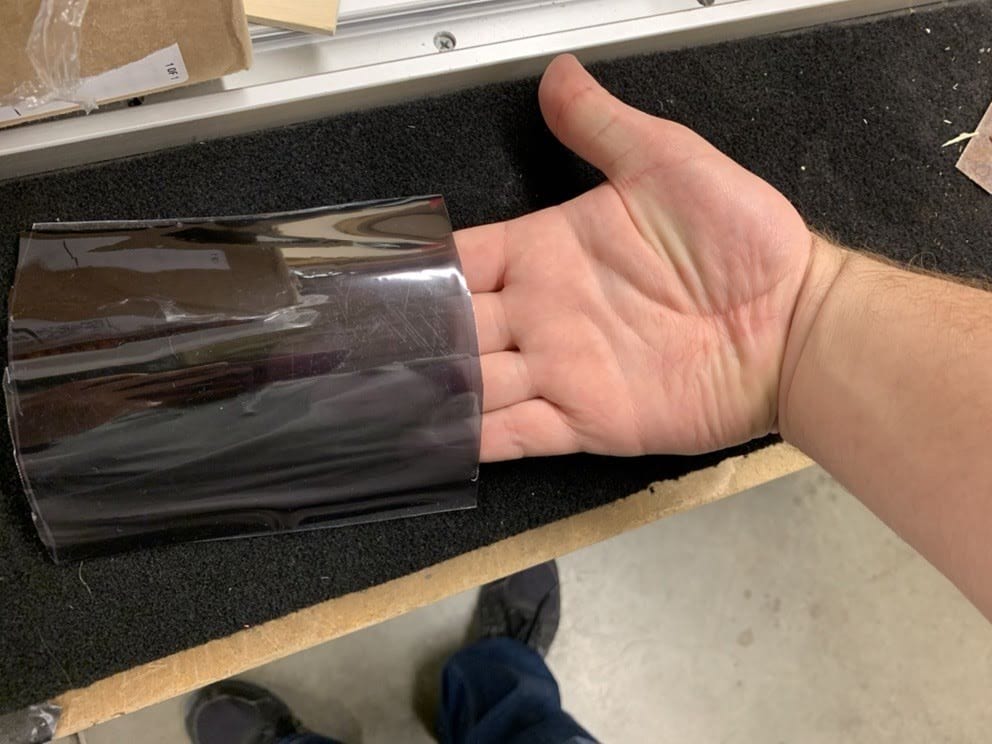
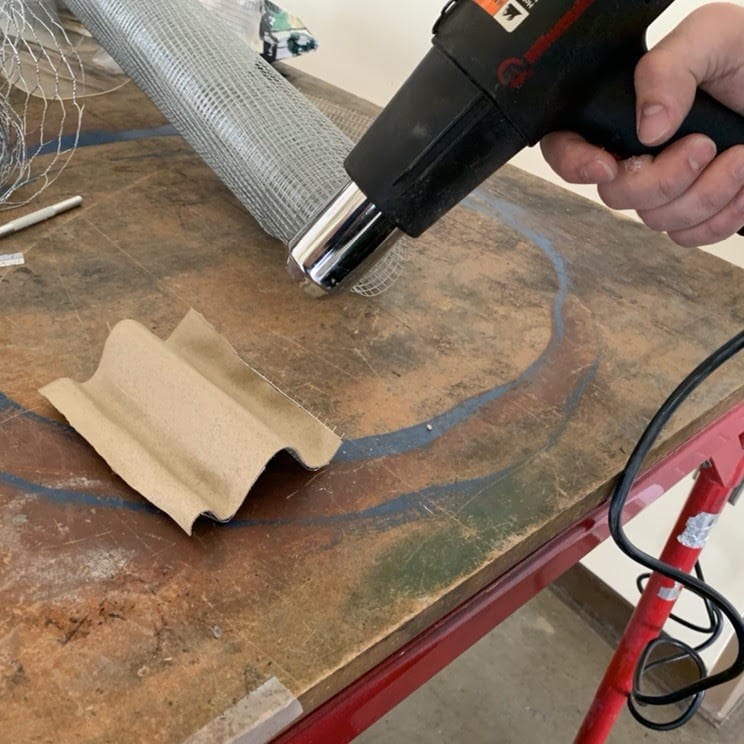
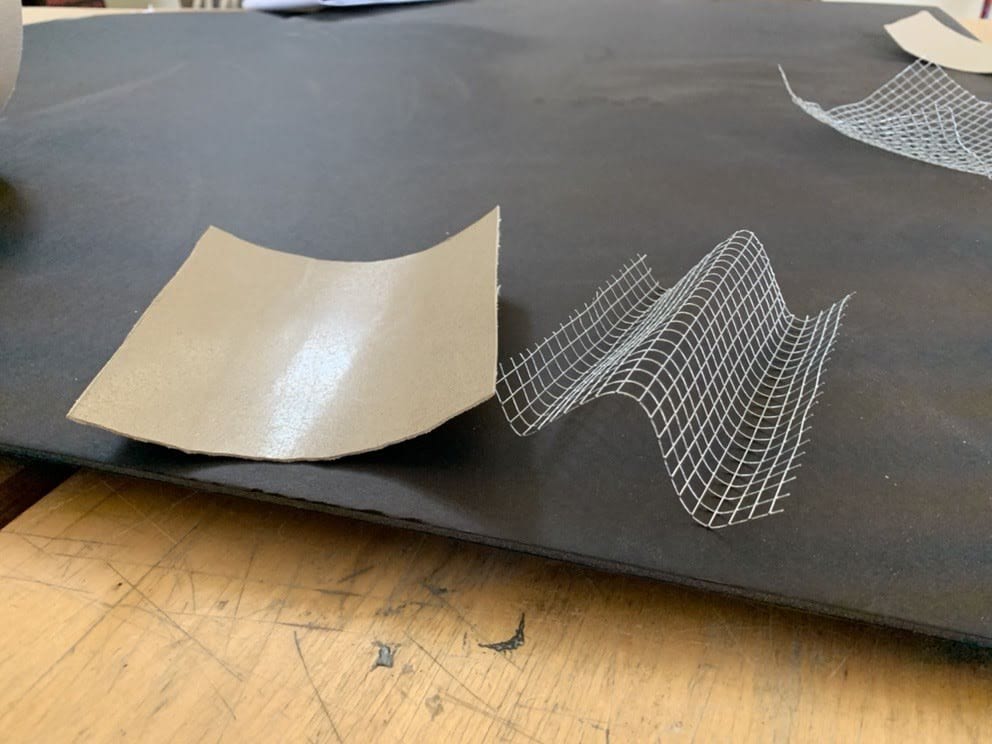
Thermoplastic was set to be the outer shell of our entire prop; it needed to make a perfect first impression as a sleek, sci-fi spaceship. We tested opaque and transparent versions.
We found that a heat gun provided enough heat to mold it, eliminating the need for an industrial oven. It molded into sharp curves easily, but overheating it could cause it to bubble. The paint stuck well, and metallic spray-paint would create the perfect finish over the smooth thermoplastic.
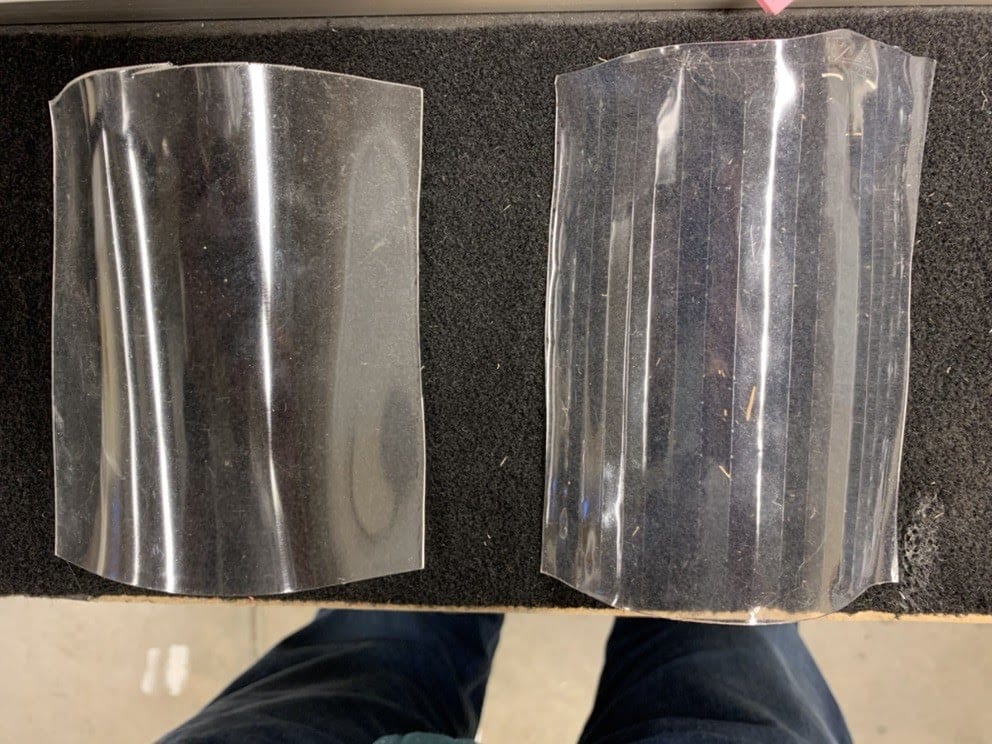
We found that 1/4″ mesh provided enough structure for the thermoplastic to mold smoothly, but that this mesh showed on the transparent version, as seen above (right). Placing a cloth between the mesh and thermoplastic (left) fixed it.
Manufacturing
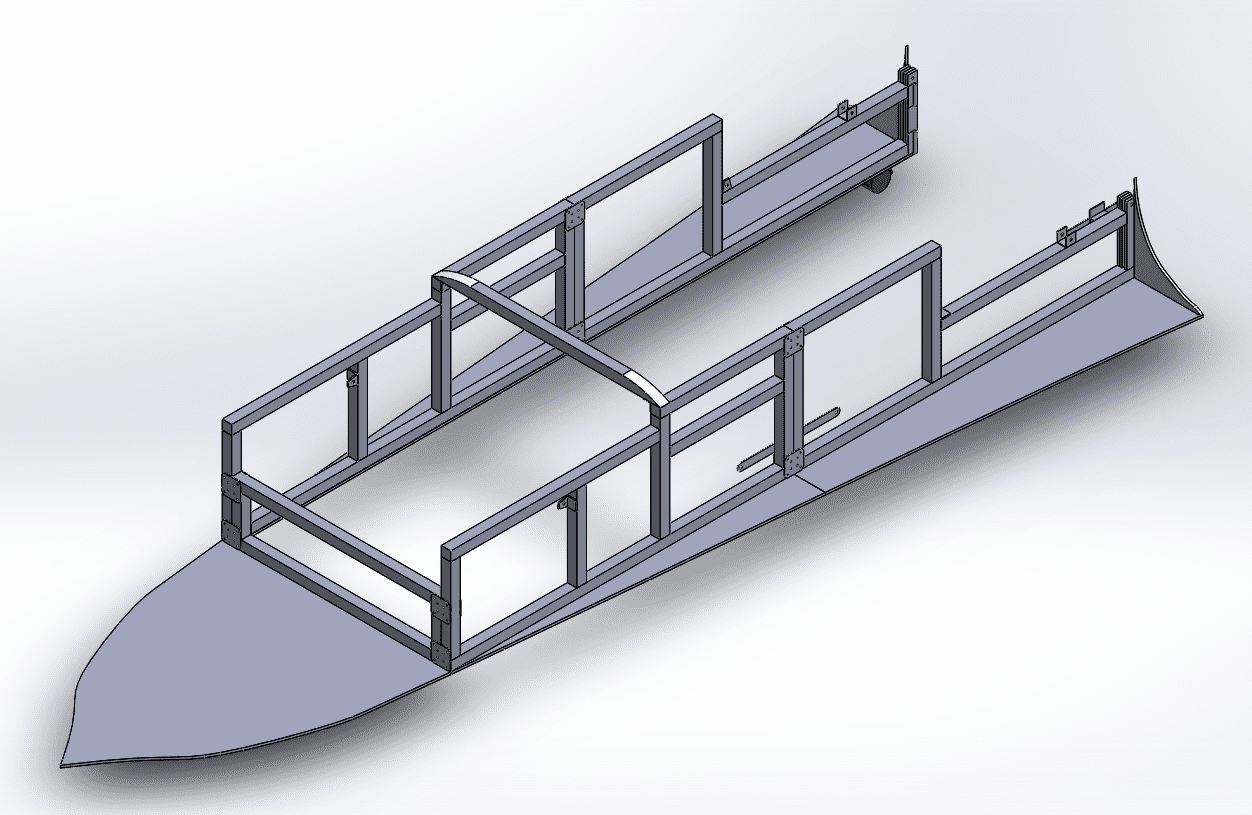
Wood structure

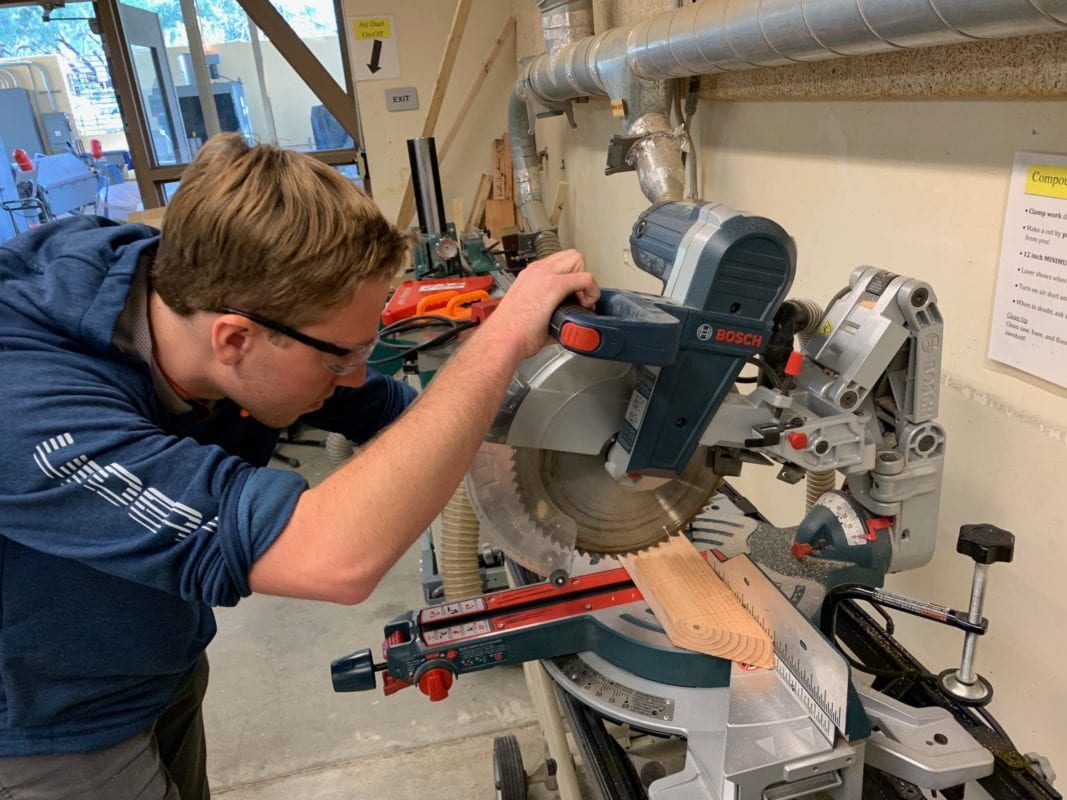
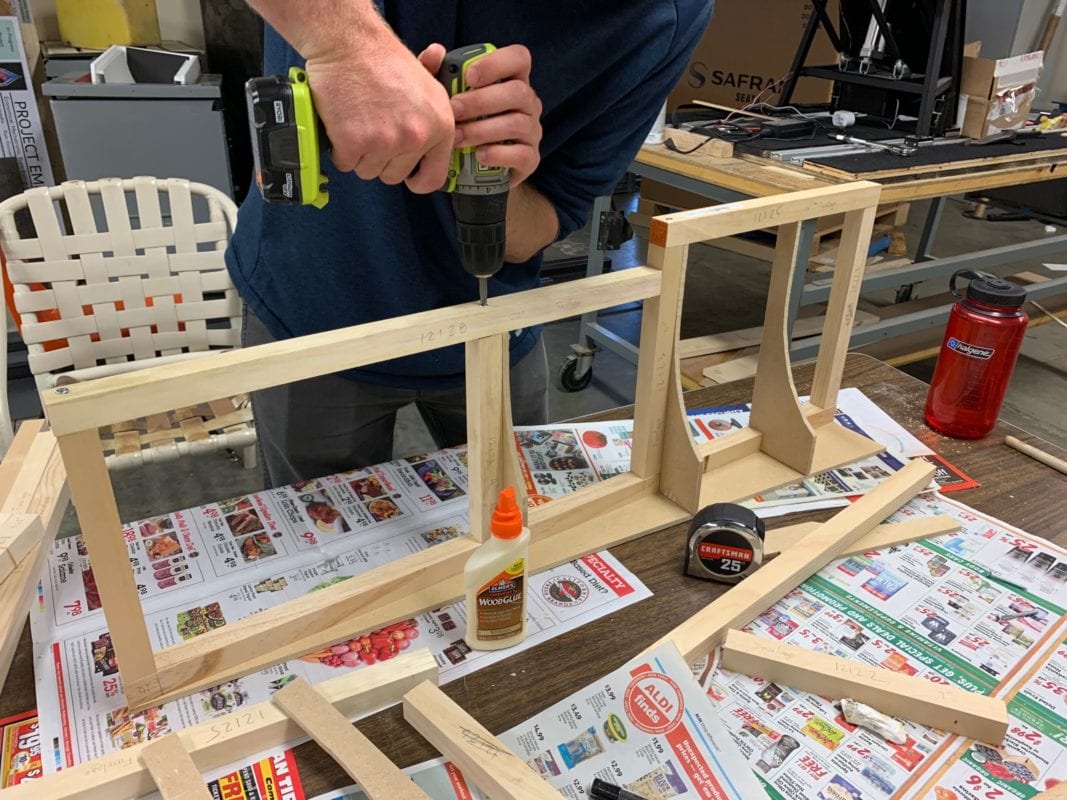
We designed this prop to be mainly made of wood because it didn’t need to take high loads, it only needed to last for five performances, it was relatively manufacturable, and it came at a low cost.
The 2×4, 2×2, and 1×1 wood pieces only needed simple miter saw cuts, followed by assembly with screws and wood glue.
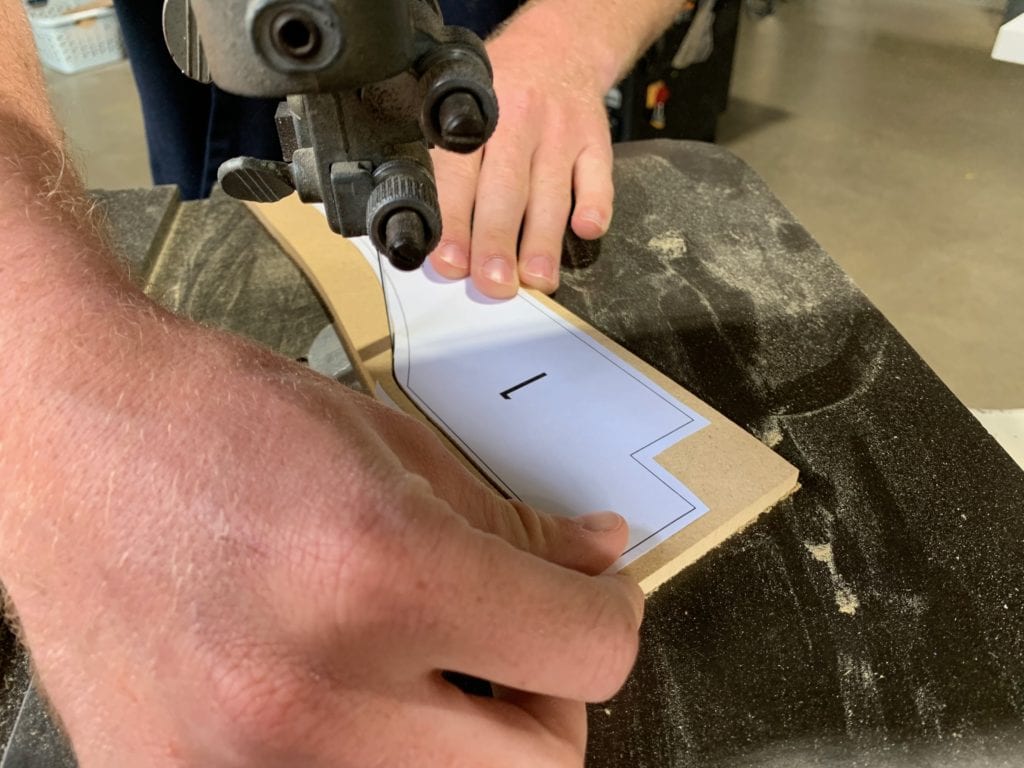
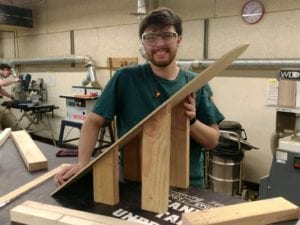
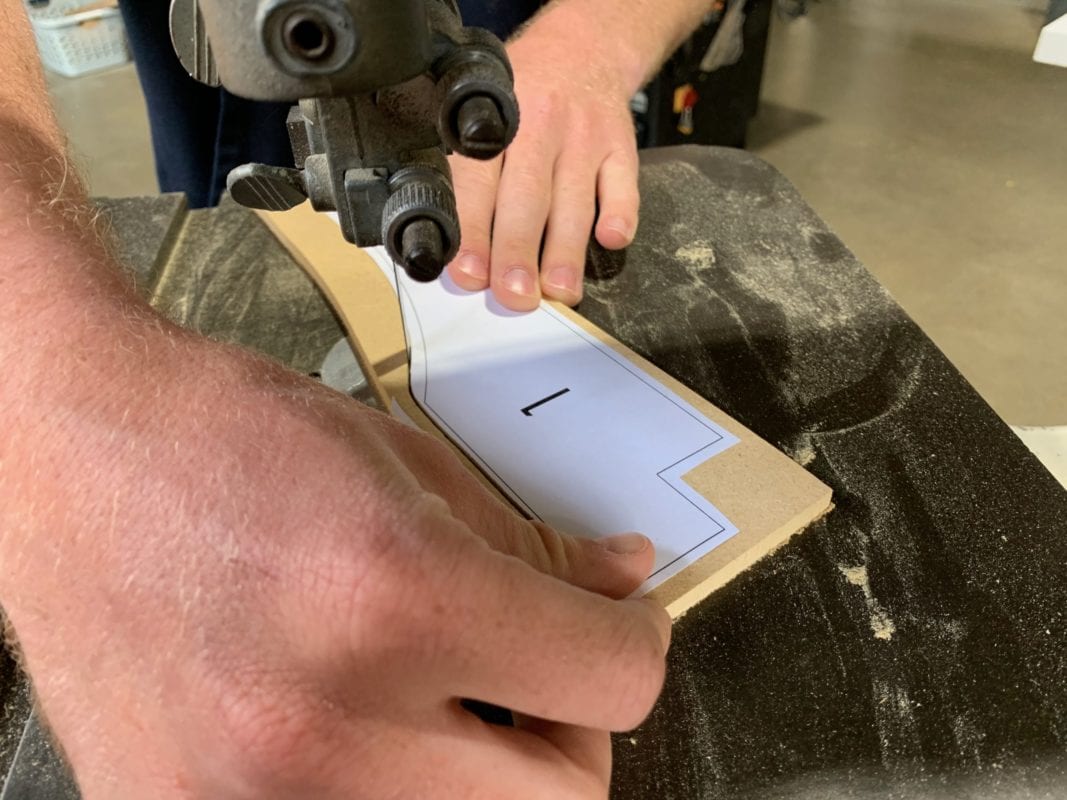
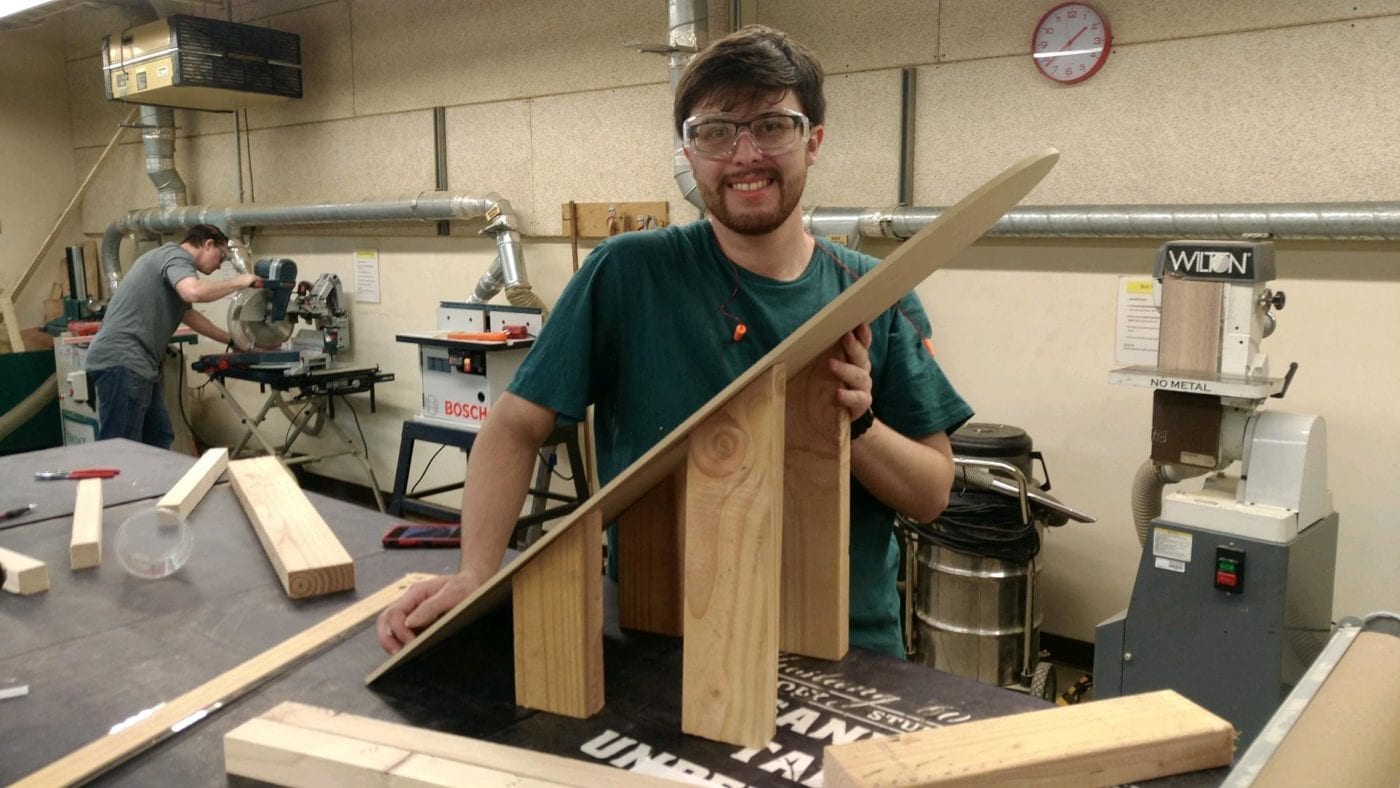
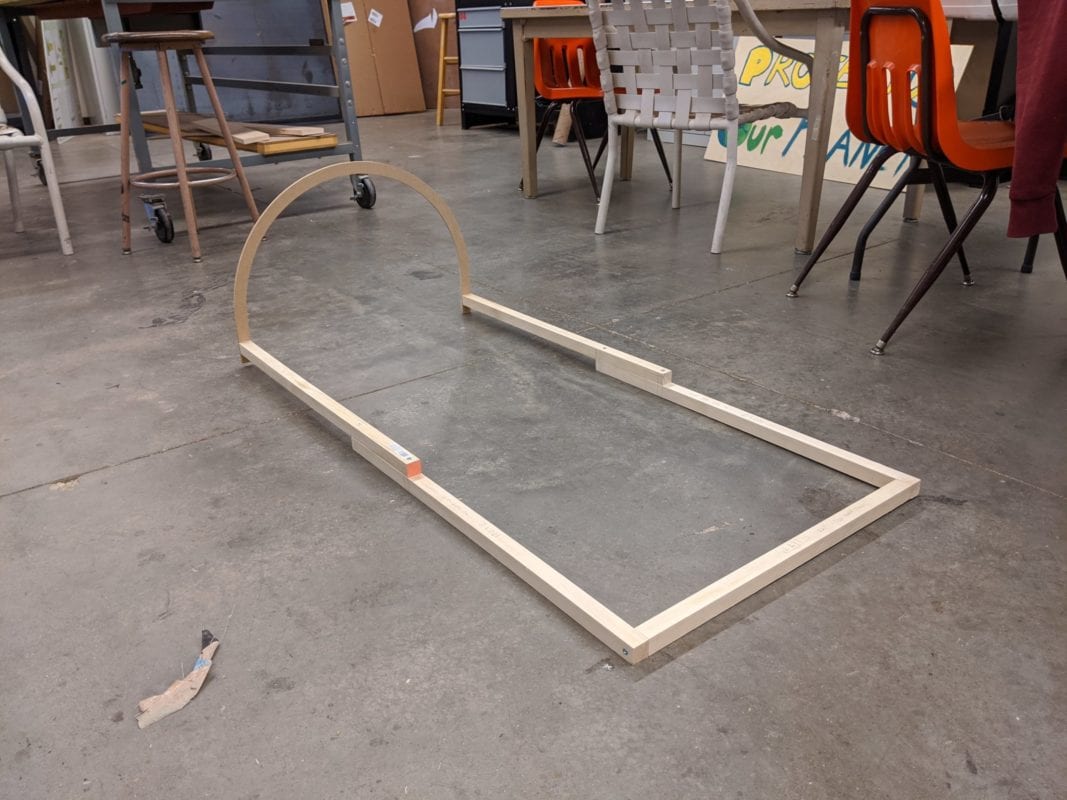
We used the 1/4″ MDF board for the seat surfaces, nose cone base, and wings. The wings required very specific curves to create the sleek spaceship aesthetic, so we printed full scale templates on the plotter and cut them out with a bandsaw.
unfinished manufacturing
After augmenting the frames with aluminum strips and chicken wire to act as a mold, manufacturing would have included laying up the thermoplastic shell over the top hatch and fuselage, installing the gas springs, screwing the rear hatch on via hinges, hooking up the fog machine to the thrusters with flexible tubing, and spray-painting the entire assembly.
Top Hatch
frame
closed 4-bar linkage
Open hatch
open 4-bar linkage
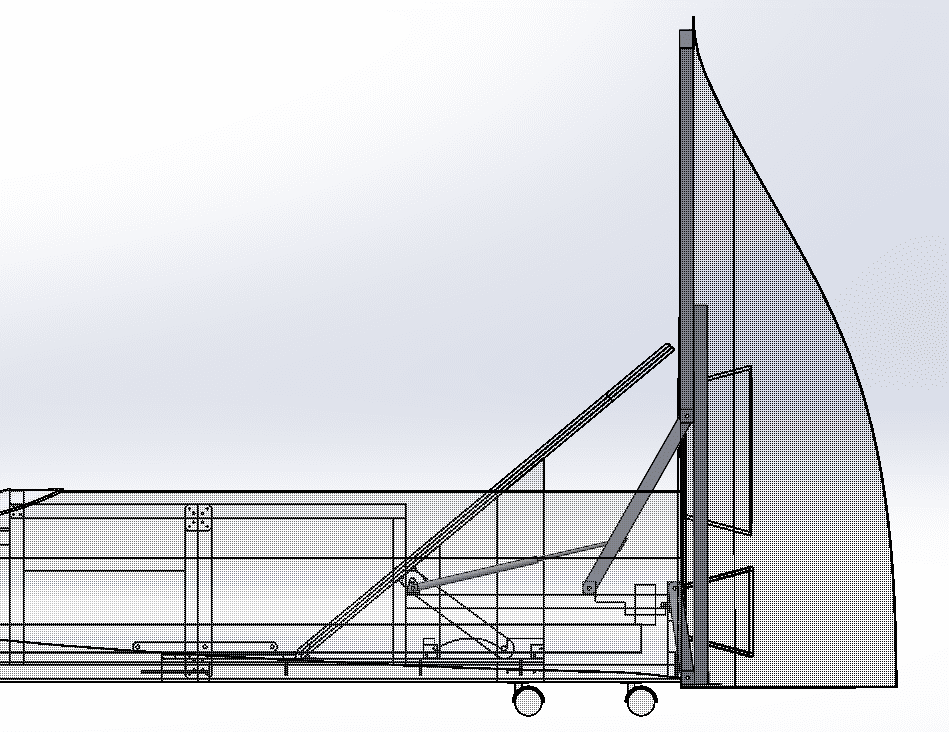
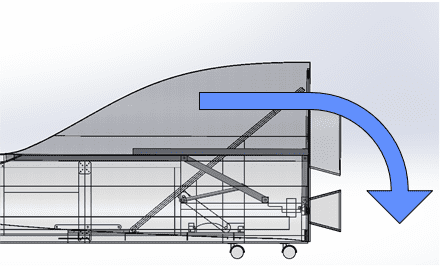
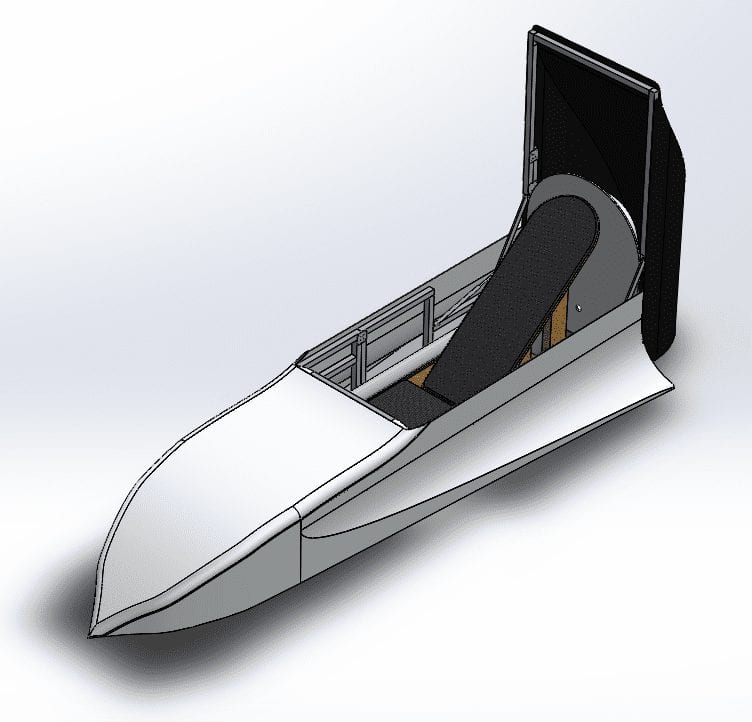
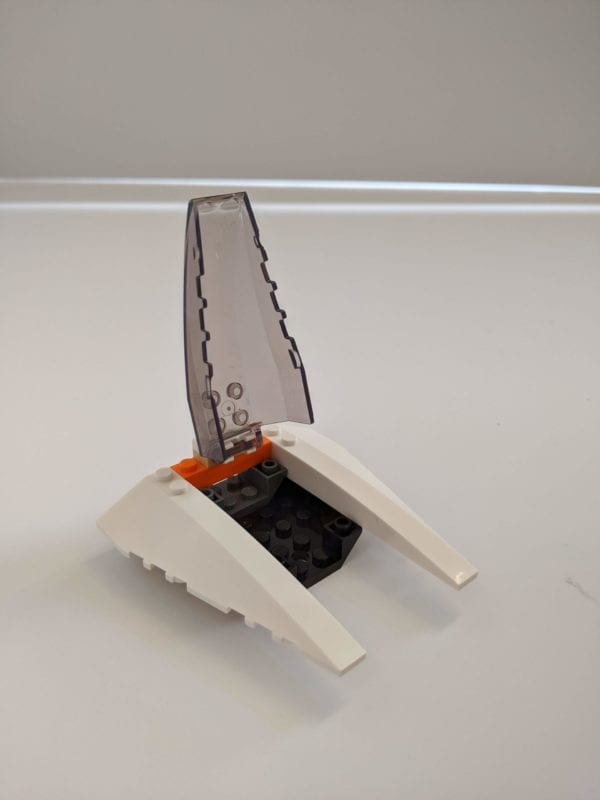
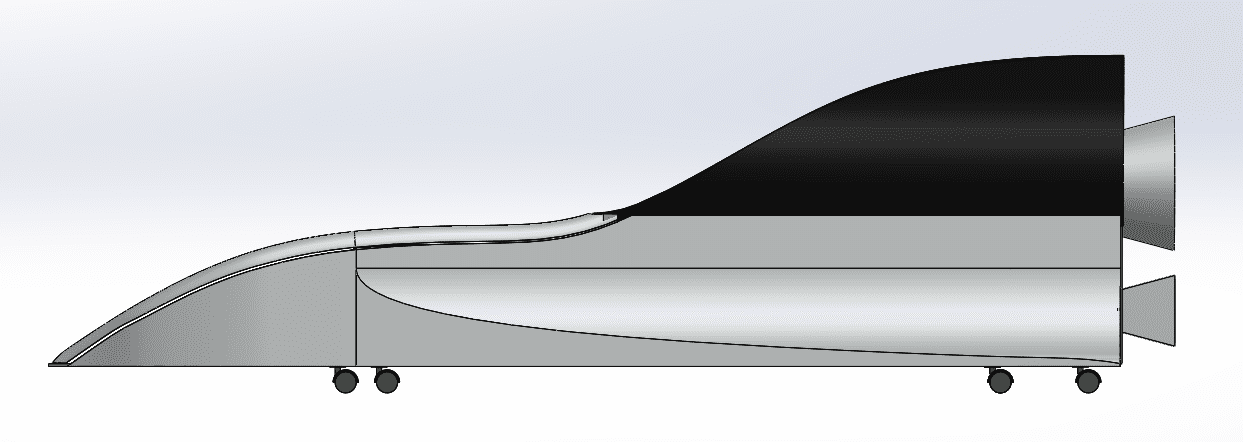
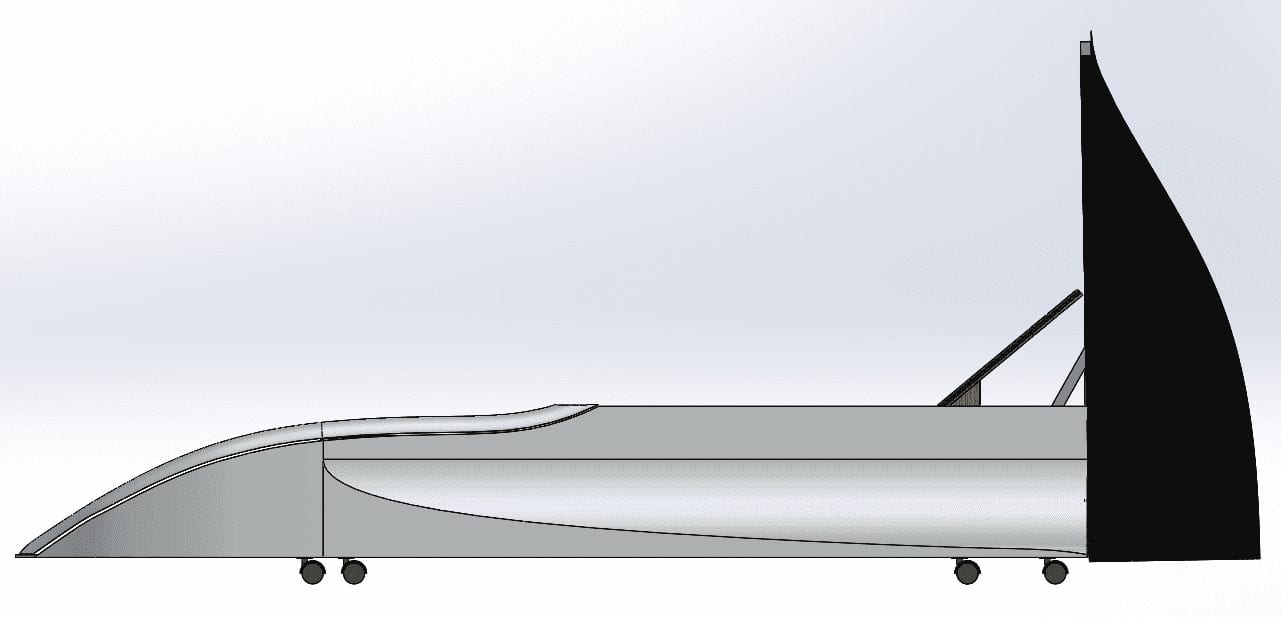
The top hatch had three components: the frame, the 4-bar pivoting mechanism, and the thermoplastic shell.
The frame had aluminum strips fastened to a wooden structure, creating hoop supports for the thermoplastic shell. The 4-bar linkage is actuated by a gas spring, while the top hatch is latched in place until the actor releases the latch.
The unique geometry allows the hatch to seemingly slide and pivot backwards simultaneously, appearing more sci-fi than a simple pivot. This motion lets the top hatch rest against the back of the ship after opening, making it more sleek to the audience and more structurally sound.
We intended to use tinted clear thermoplastic for this hatch. This would allow the audience to see the figure moving inside, but keep his identity a mystery until the actor reveals himself.
Thrusters
To maximize space for the actor and allow him to enter from the back, we place the fog machine in the cramped space of the nose cone, under the guitar. However, we still needed fog to leave through the thrusters on the back, so we connected the two ends with flexible tubing.
Final Build
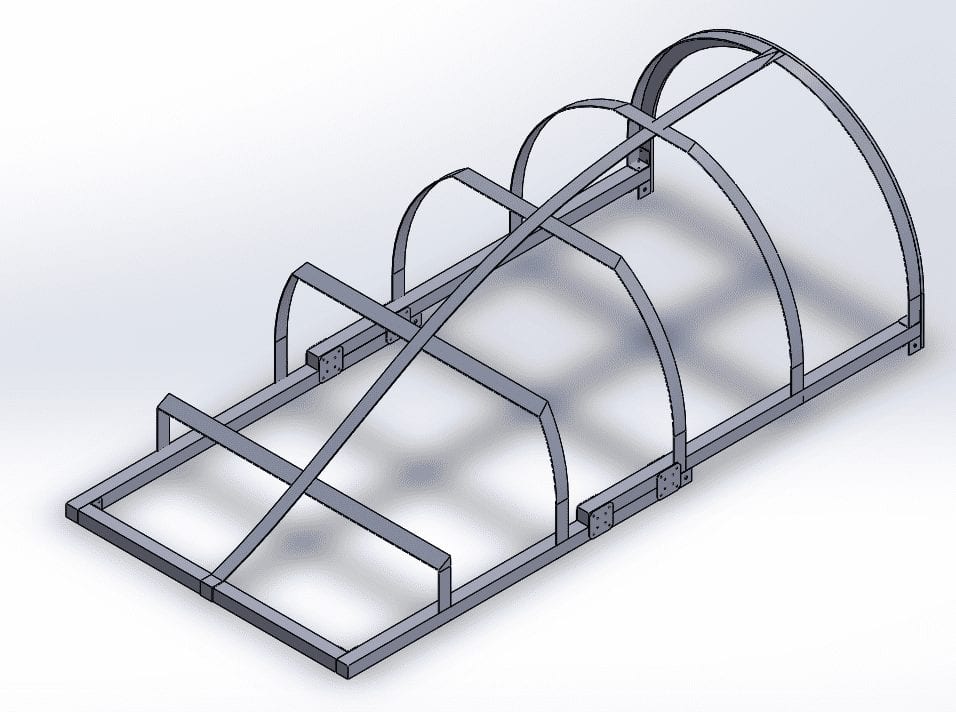
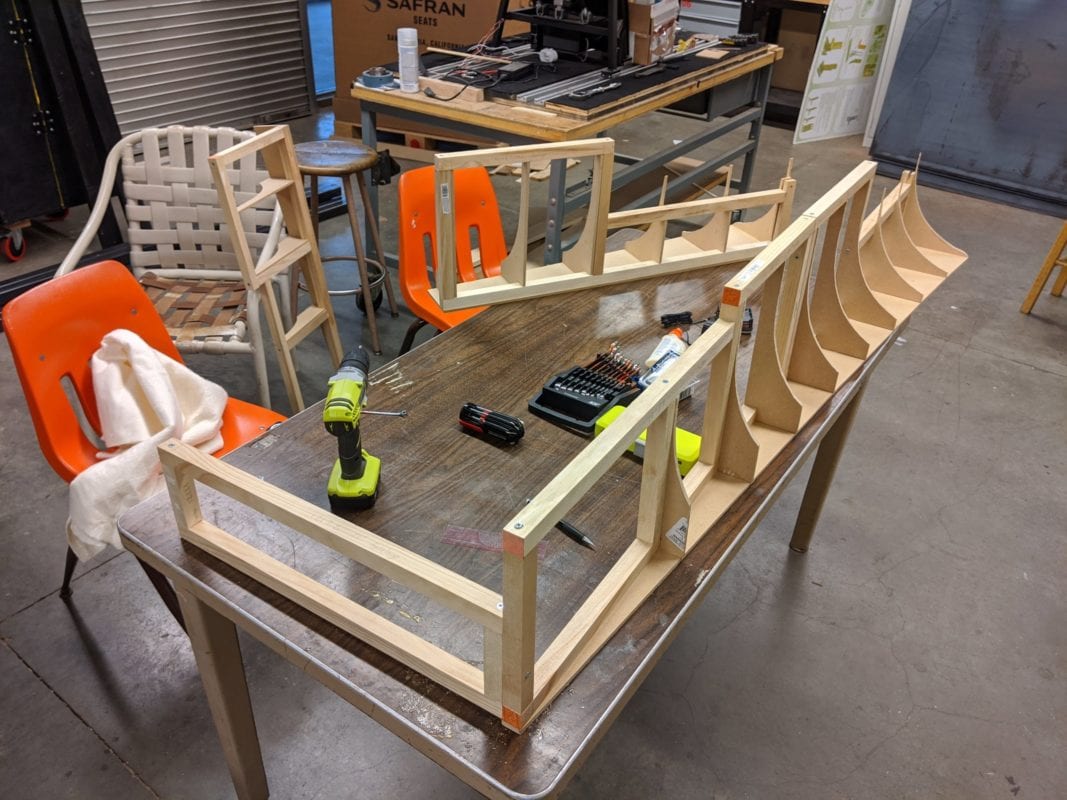
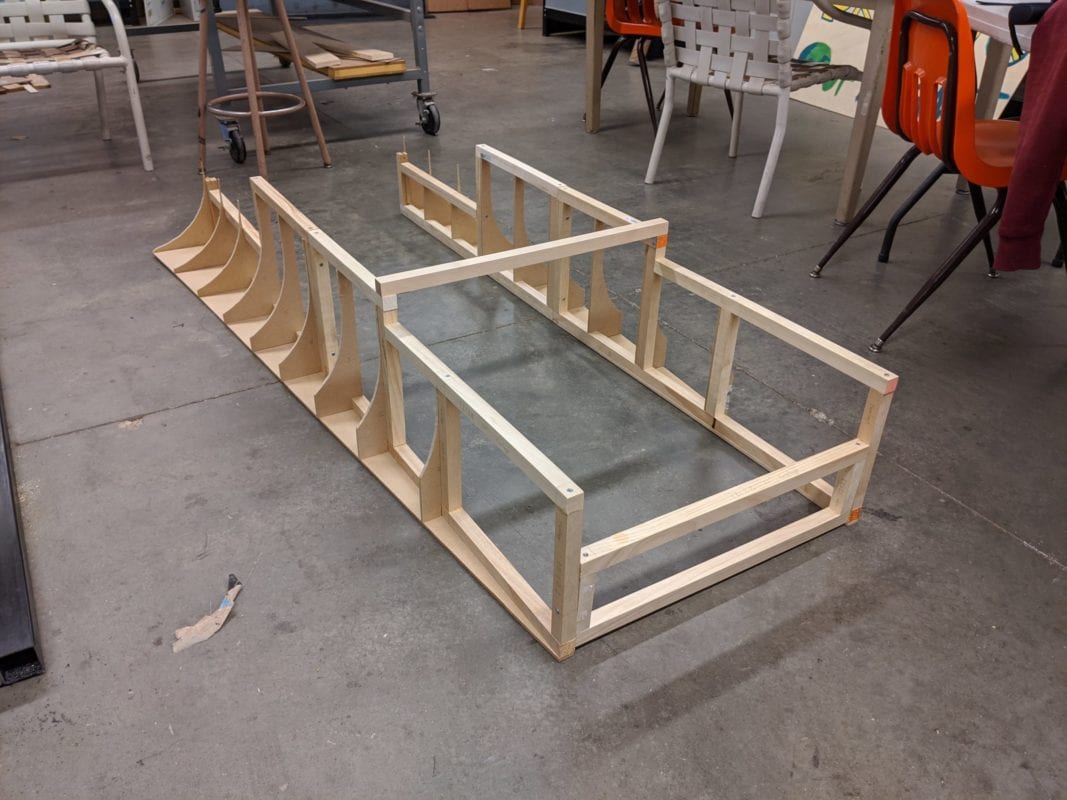
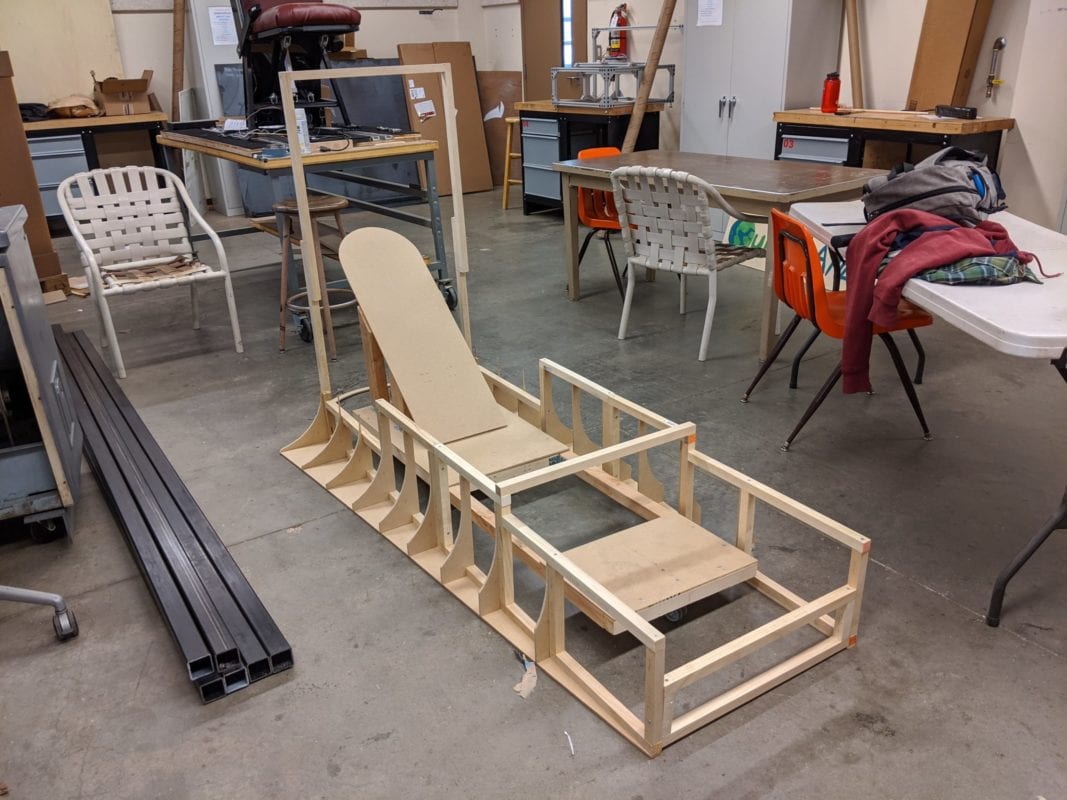
Frame
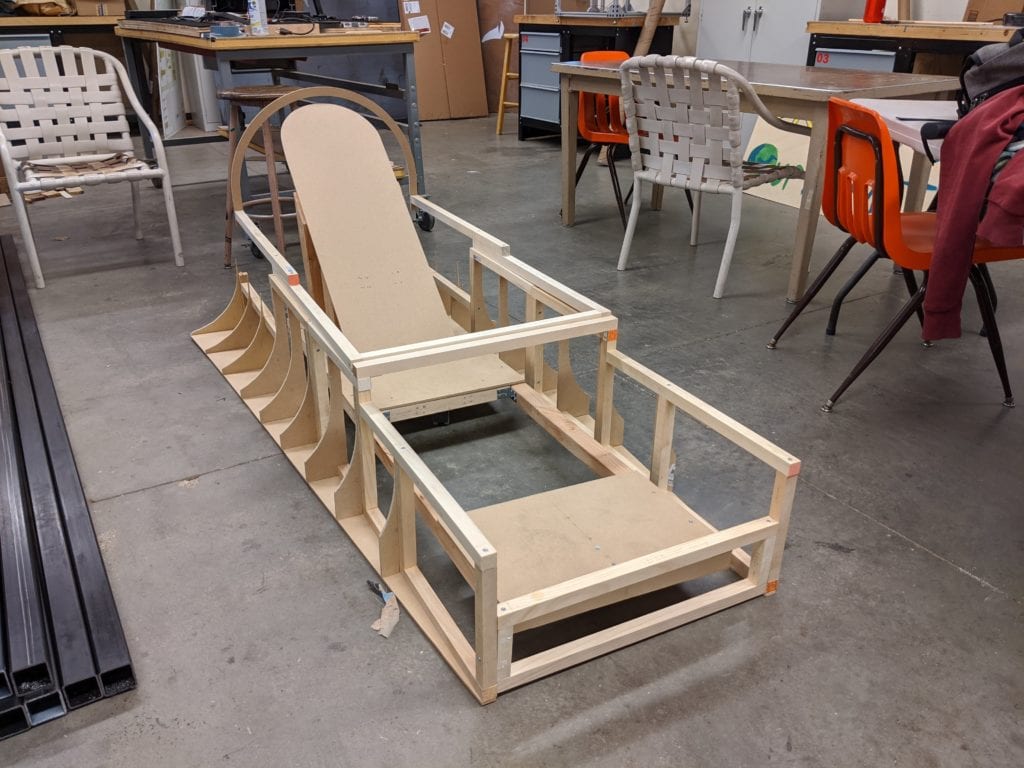
Our project was cut short by the Covid-19 pandemic, abruptly reducing the scope from three quarters to two. We had just completed our Interim Design Review, showcasing the manufacturing progress you see above. This includes the pilot seat, fuselage frame, and top hatch frame.
We deemed this to be 40% built. The pilot seat just needed padding and painting, but we still had to add aluminum strips, a nose cone, and chicken wire to finish the frame.
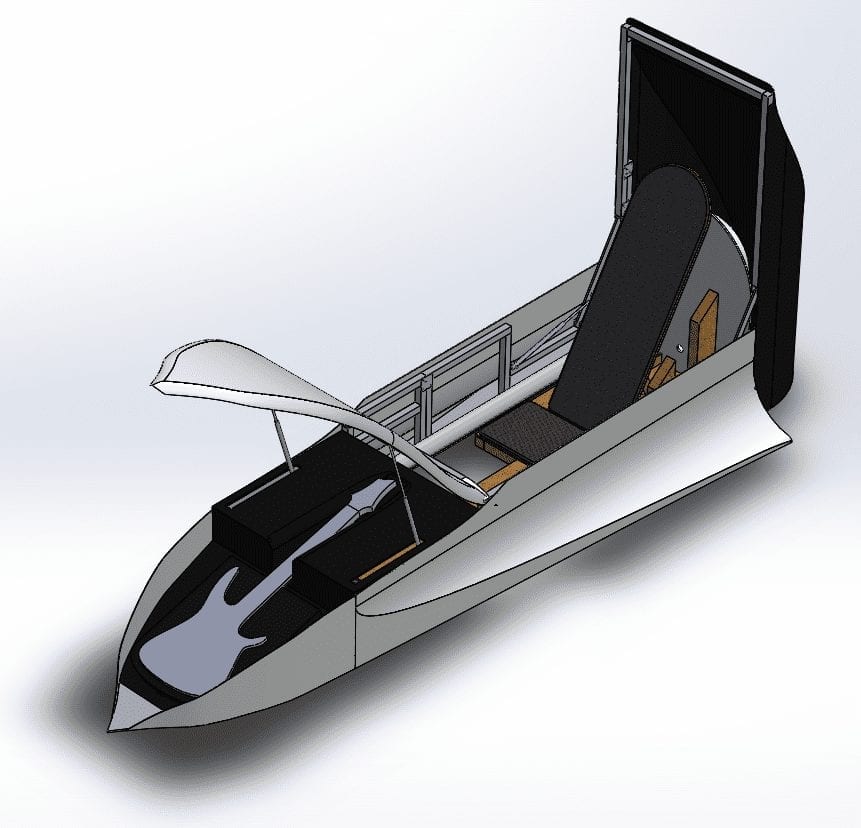
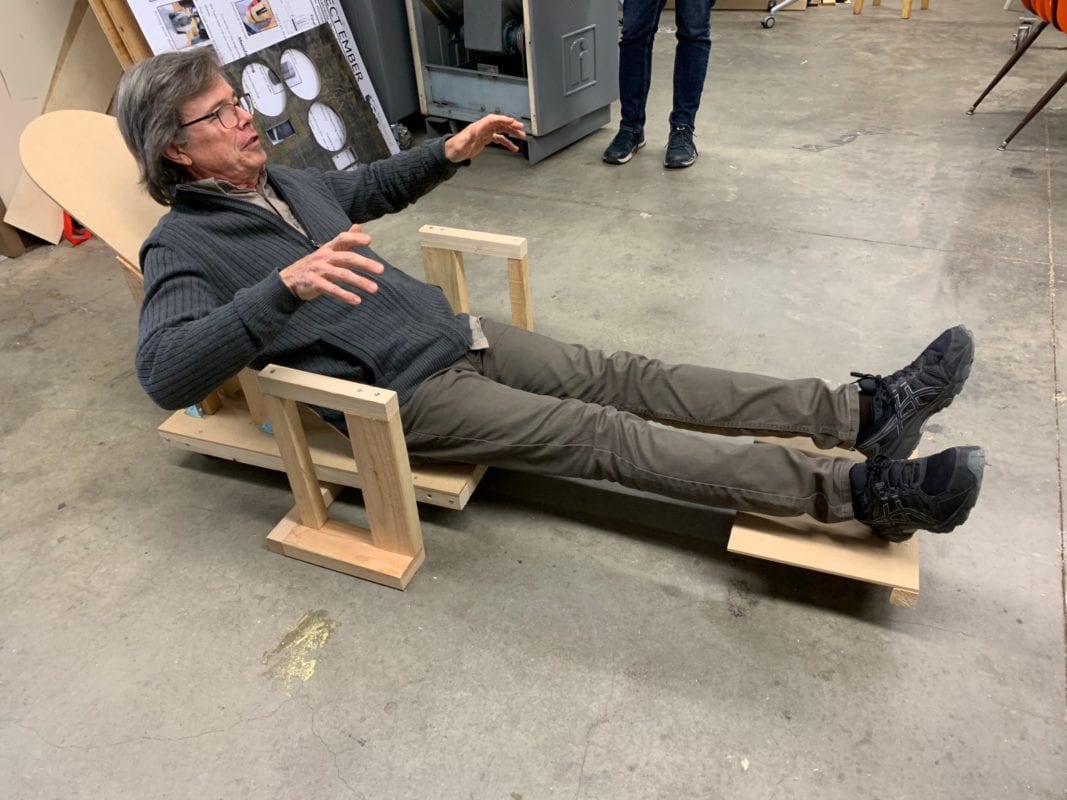
pilot seat
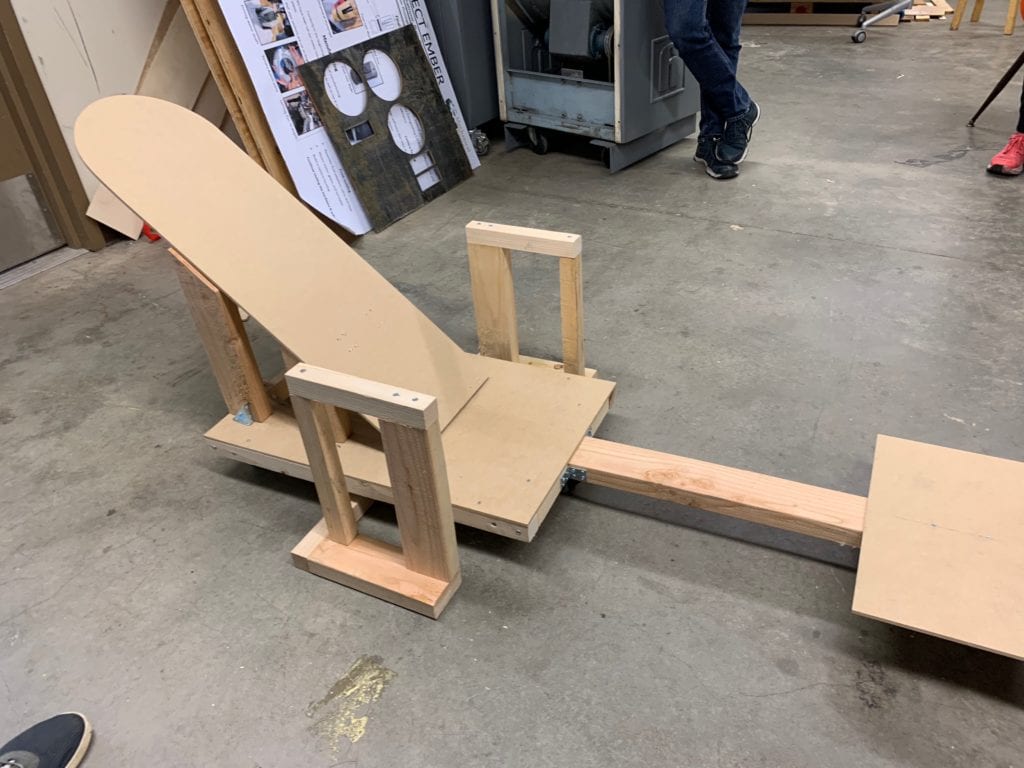
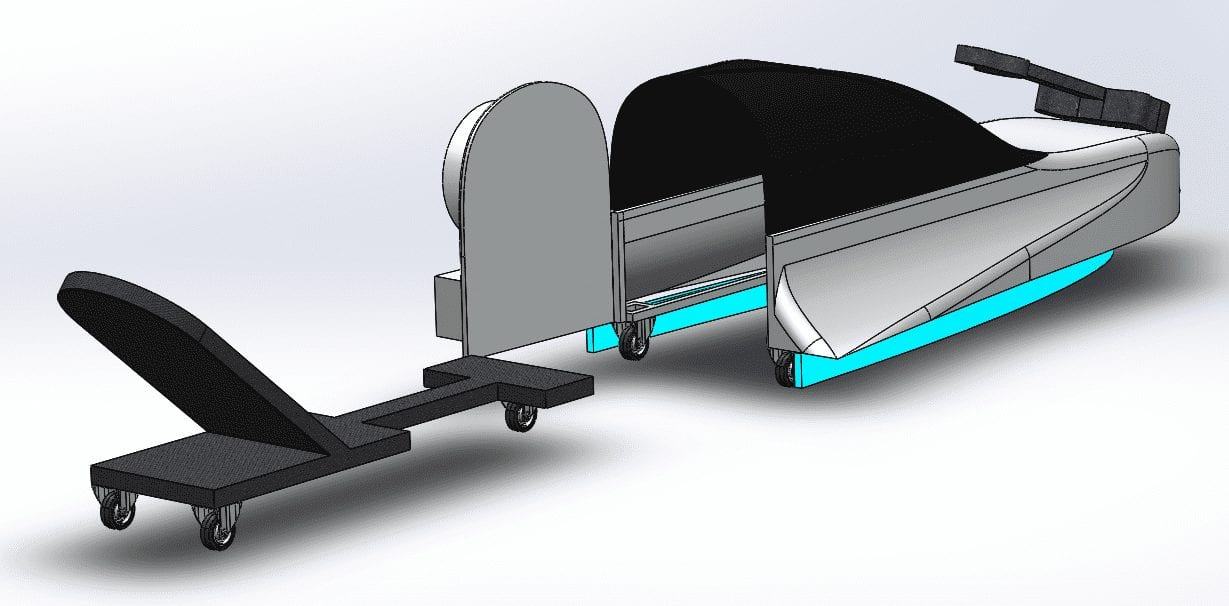
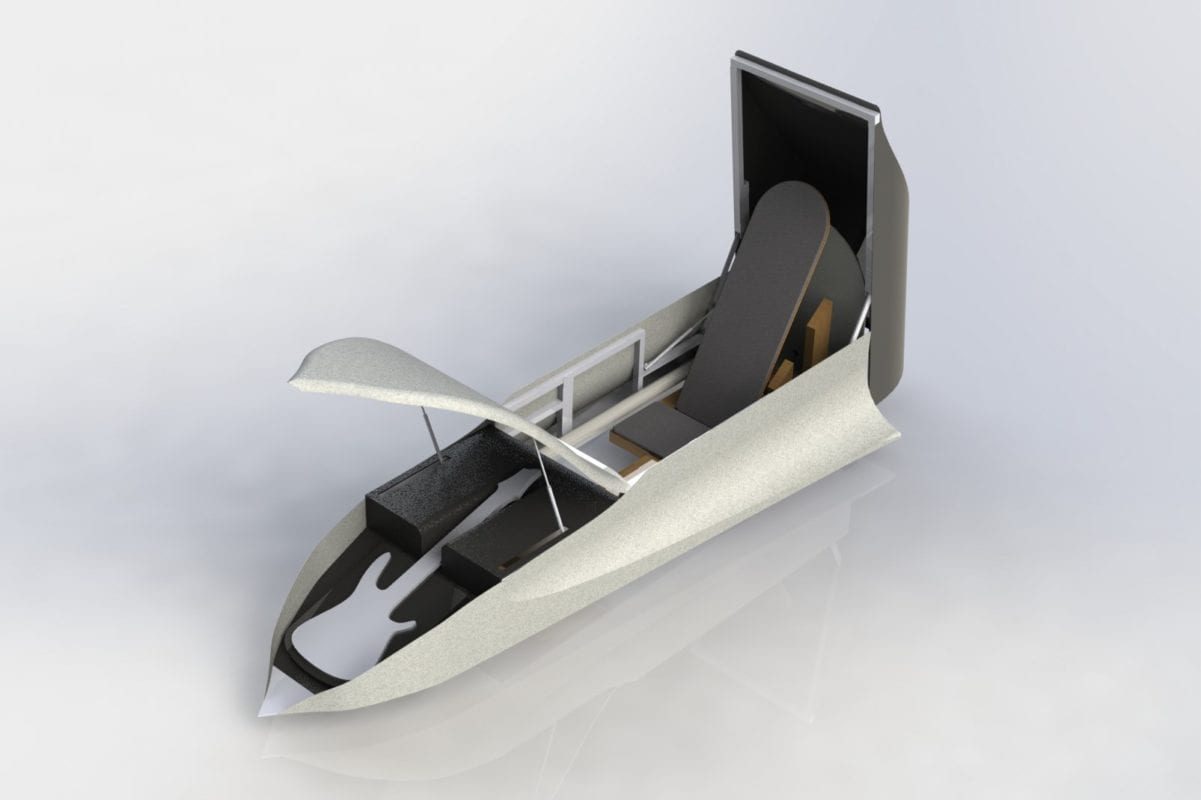
The most limiting factor in our project was the height we had to work with: 32.5 inches. Not only did the actor and prop have to fit – this space also needed to allow the actor to enter stealthily and exit elegantly with all eyes on him.
It’s not easy to get up from a lounging position smoothly, but 45° was the best seat back angle we could achieve in the space without our actor being a contortionist. Rolling wheels allowed the actor to enter the prop easily under the stage.
The combination of the arm rests and cut-out between the seat and the footrest allowed the actor to exit elegantly. The actor could stand on solid ground, support himself at four points, get up in one smooth motion, and step out
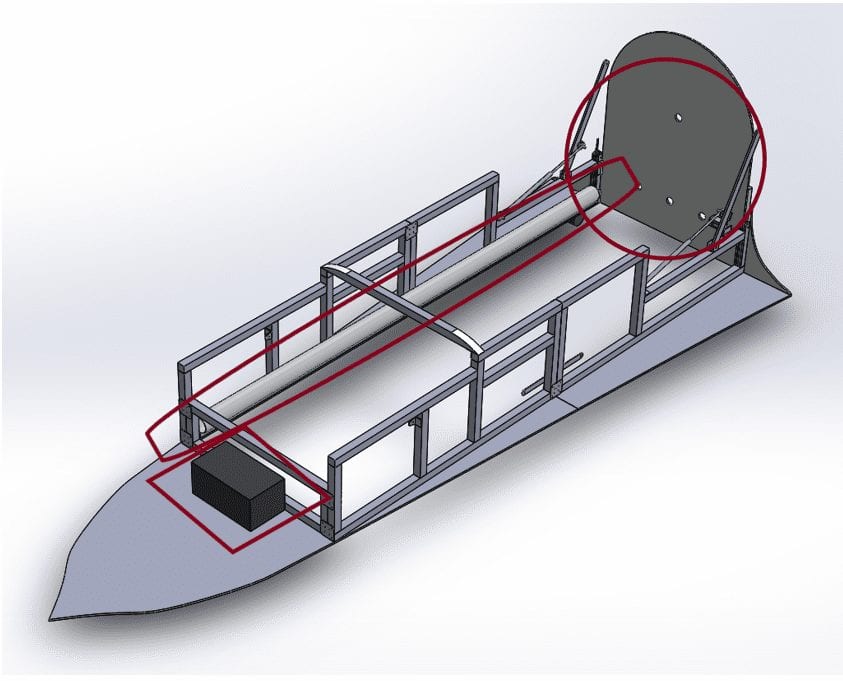
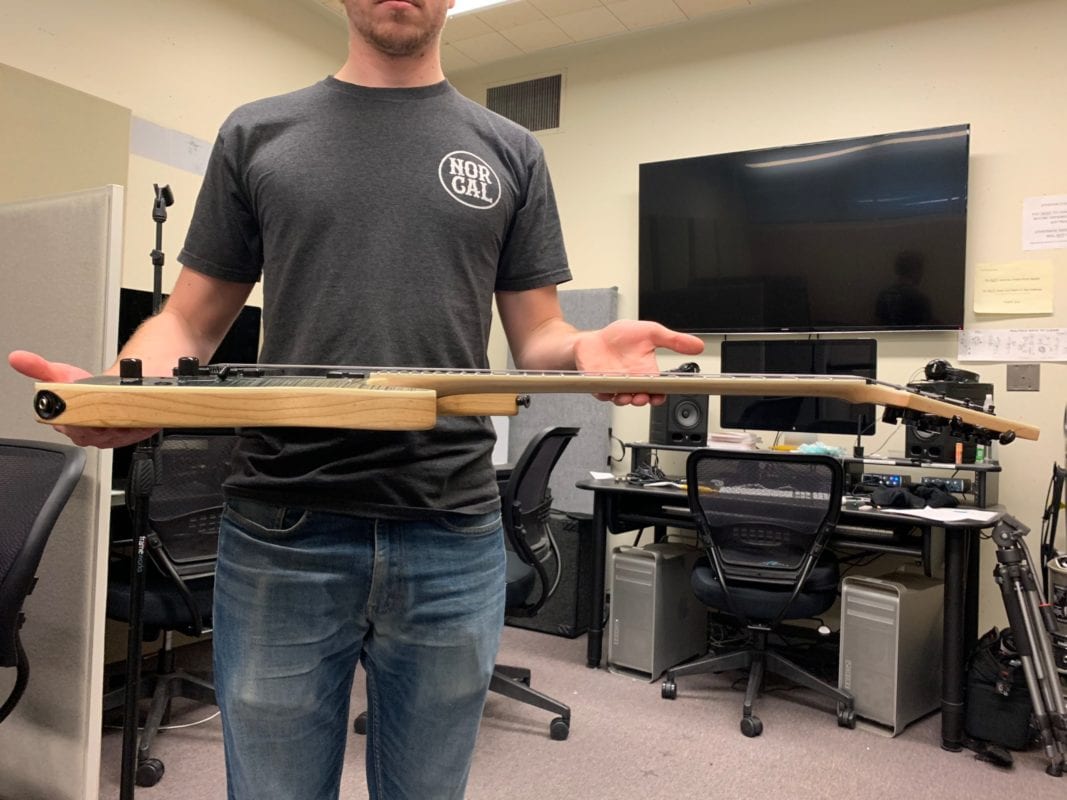
Guitar Compartment
The idea to store a real guitar in the ship arose from conversations with our sponsor, the director of the performance. After measuring the exact dimensions of the guitar, we found that if fit snugly in the nose cone of our ship. This led to the idea of it acting as the ship’s power source.
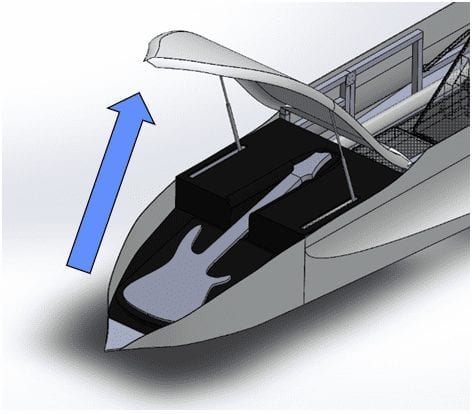
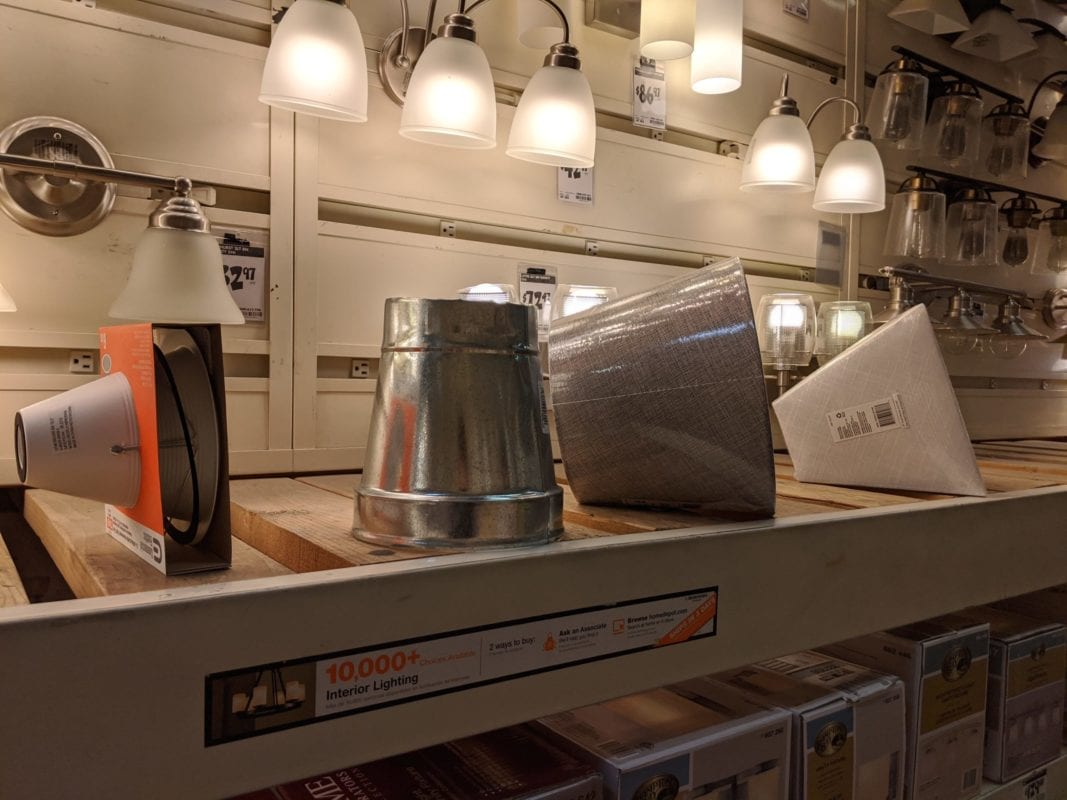
To increase the mystique and engine-like appearance, we placed the guitar under a hood actuated by gas springs.
This guitar was expensive, so we padded the entire nose cone with foam. The hood is made of wood and aluminum strips with thermoplastic molded to it. It can open just enough under the stage to allow a stage hand to load the guitar.
Rear Hatch

The rear hatch provided a means of both entry and emergency exit. It swings out on a simple hinge, and latches into place with the gate latch seen on the left side of the picture above. In the case of an emergency, the actor can pull the lever on the right. It is connected to the gate latch with a cord, opening it and allowing him to roll out on the pilot seat.
The lever is placed to be easily and ergonomically accessible while the actor is in the prop on the pilot seat.