The 2020 SourceAmerica collegiate design challenge required our team to create a device that will help improve the quality of life and productivity of people with disabilities working in the kitting and packaging industry. This senior project focused on the design of the kitting workstation so that it is affordable, portable, and reusable.
Our Team
Kyle Chuang
Hey, I’m Kyle! I’m a 4th year M.E. concentrating in Mechatronics. I have an extensive background in 3D modeling, design, and prototyping.
I’m a huge football fan (Go Dolphins!) and an avid gamer.
Christopher Tan
I am Chris, a 4th year M.E. undergrad. I have manufacturing, teamwork, and design experience from Cal Poly Supermileage and Cal Poly Rose Float.
I love scuba diving and, listening to music, and video gaming.
Keanau Robin
Hey, my name is Keanau and I am a 4th year M.E. concentrating in Mechatronics. My interests include CAD design/modeling in hopes of implementing it within the Aerospace industry.
I enjoy watching and playing basketball, as well as playing video games and rock climbing in my free time.
Ashley Humpal
Hi, I’m Ash! I’m a 4th year M.E. with a concentration in Mechatronics. I have experience with python, data analyzation, and design.
I enjoy listening to music and playing intramural sports in my free time.
Acknowledgements
We would like to thank SourceAmerica for the opportunity to display our engineering skill set through helping workers with disabilities. We would also like to thank Professor Peter Schuster for his continuous advice, assistance, and guidance through the design-build-test engineering project life cycle.
Our Project's Videos
This is our video that we submitted to SourceAmerica’s Design Challenge.
Our Project's Digital Poster
Problem Statement
Kitting and consumer packaging are a large business line, many industries need to have small, medium and large items packaged together (first aid kits, hardware kits, etc.)
The kitting and packaging process needs to be less strenuous and easier for workers that struggle with fine motor control because certain packaging procedures require a great deal of dexterity from the user. This would improve efficiency and provide increased quality assurance.
Design Base Requirements
Individual bags of items placed into one larger bag
Each bag is sealed then placed into a sealed larger bag
Hold two kinds of 5 small items
Hold two kinds of 3 medium items
Hold 1 kind of 1 large item
Holds paper instructions
Labels on each bag and the larger bag
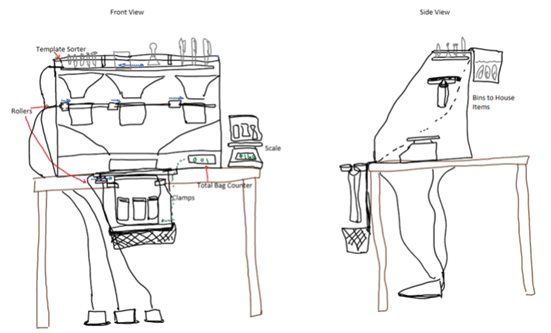
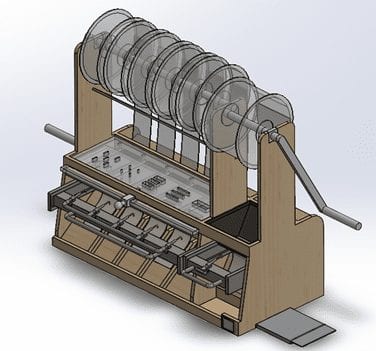
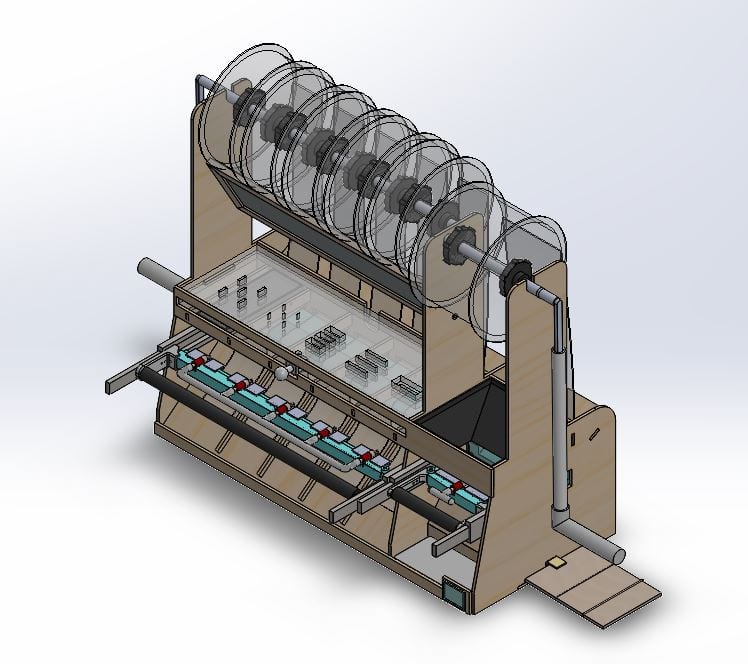
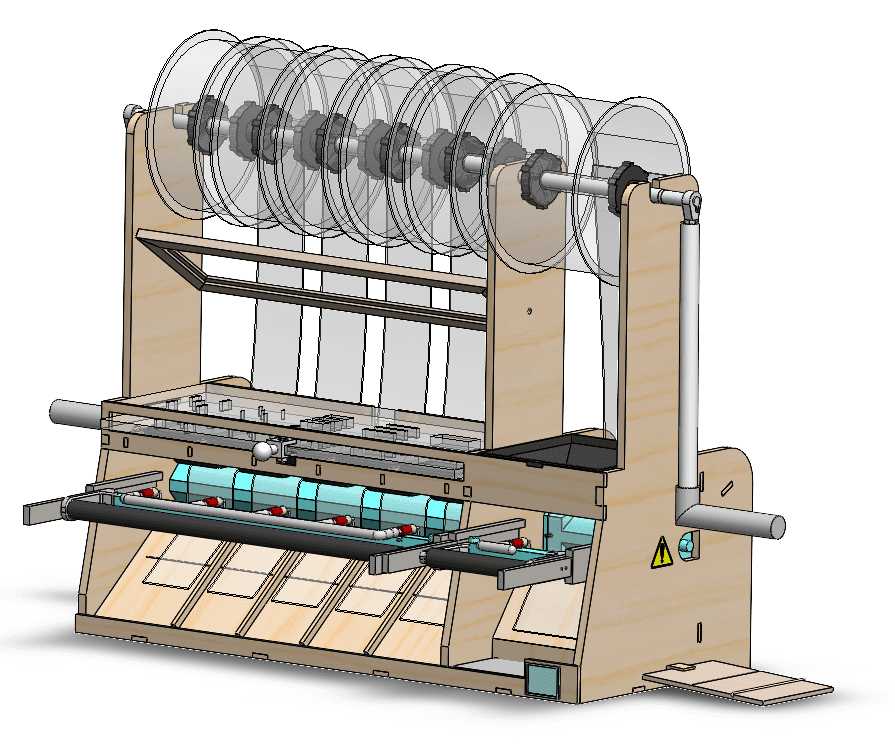
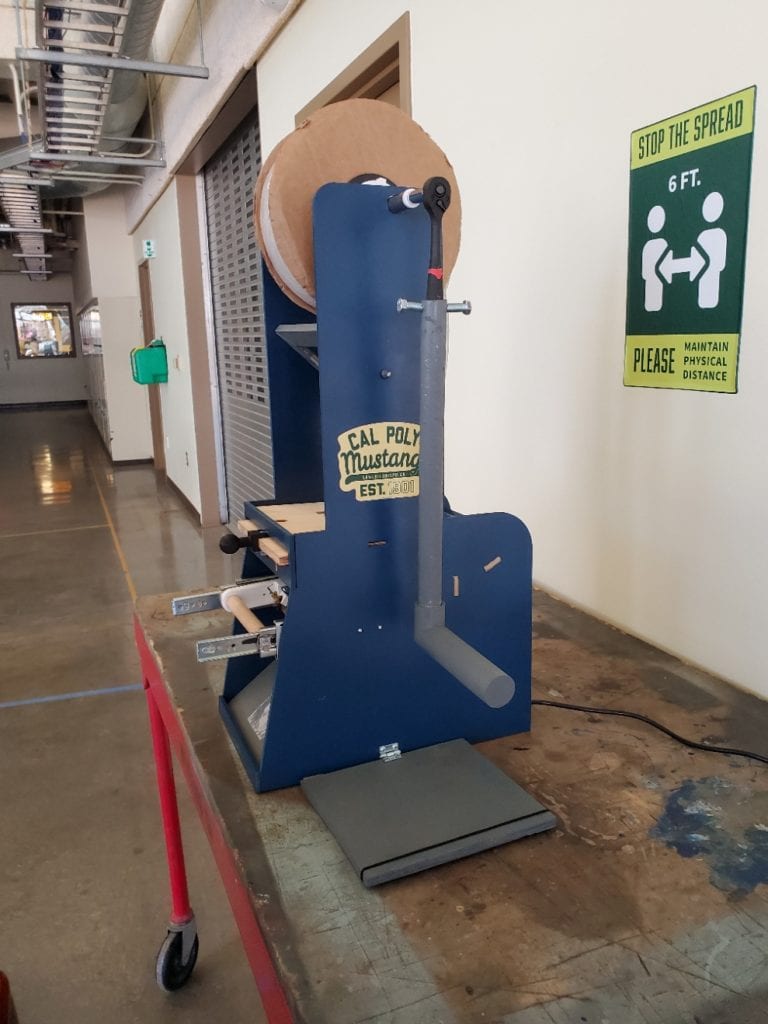
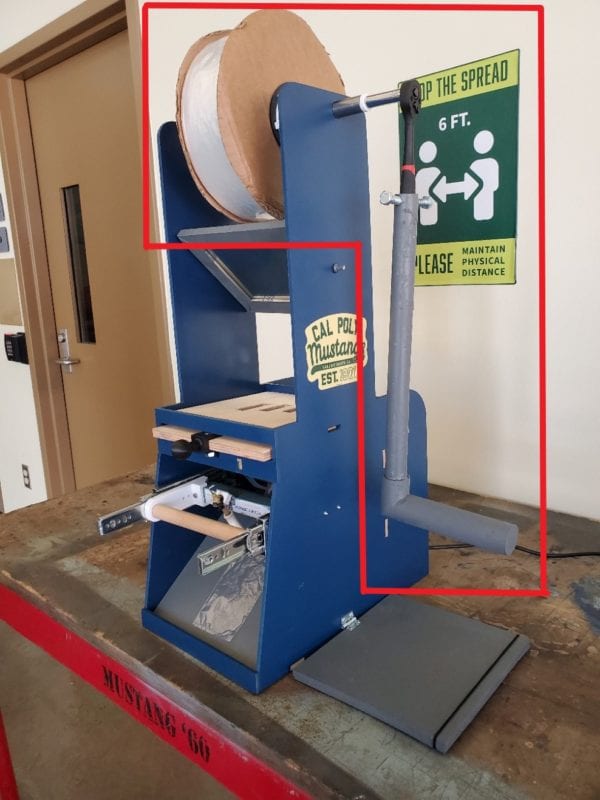
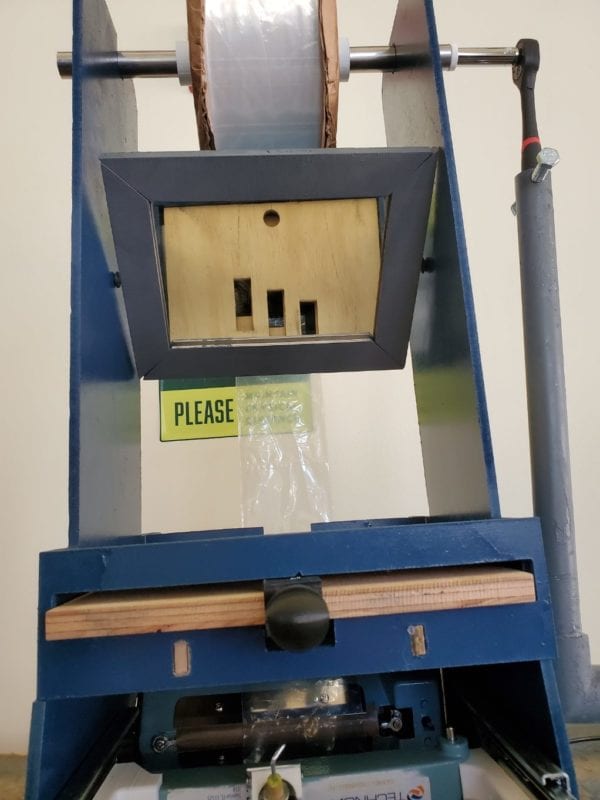
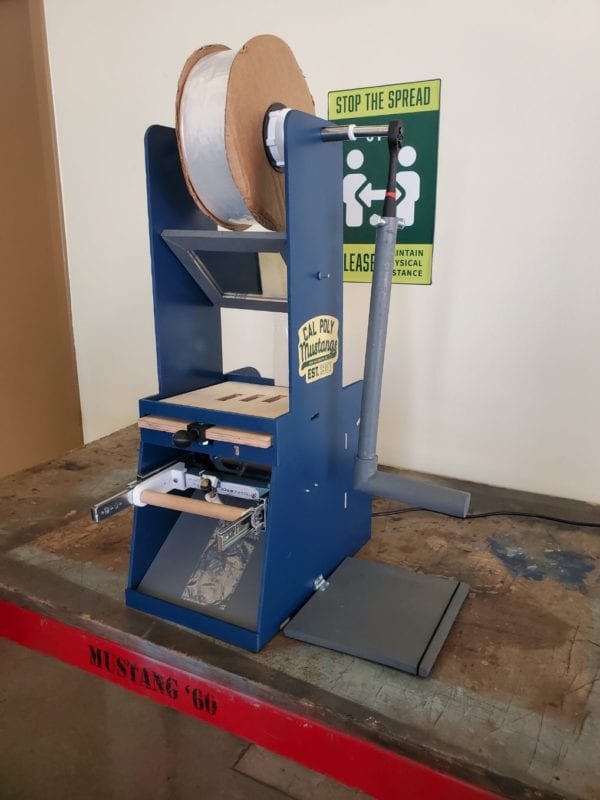
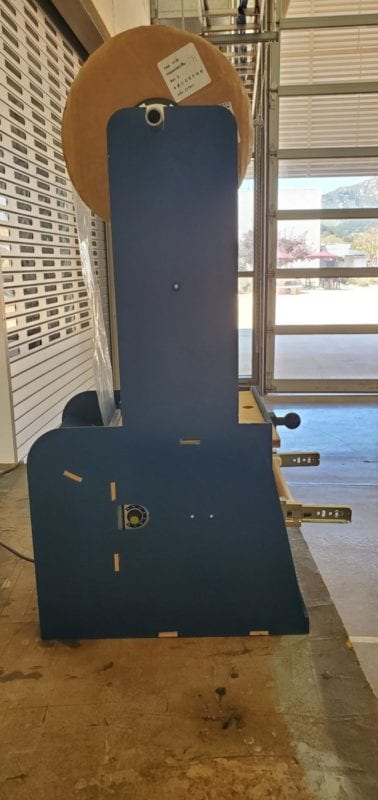
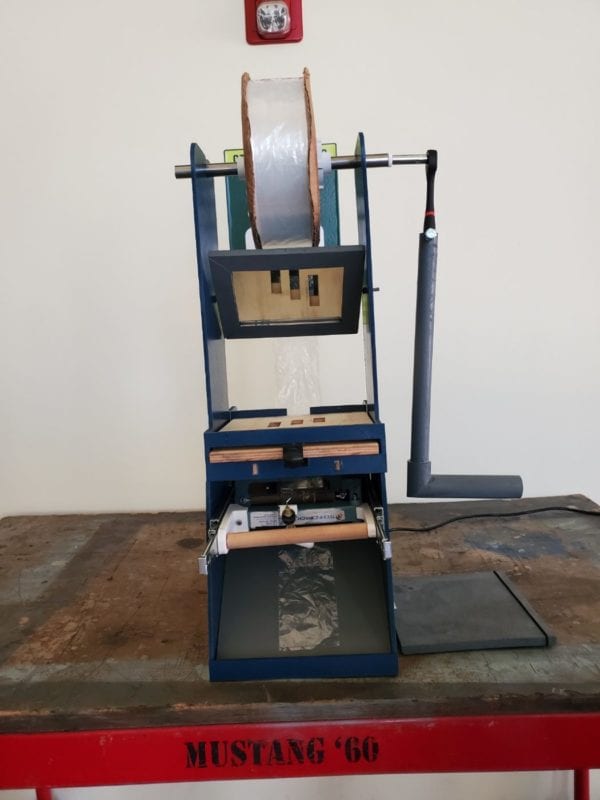
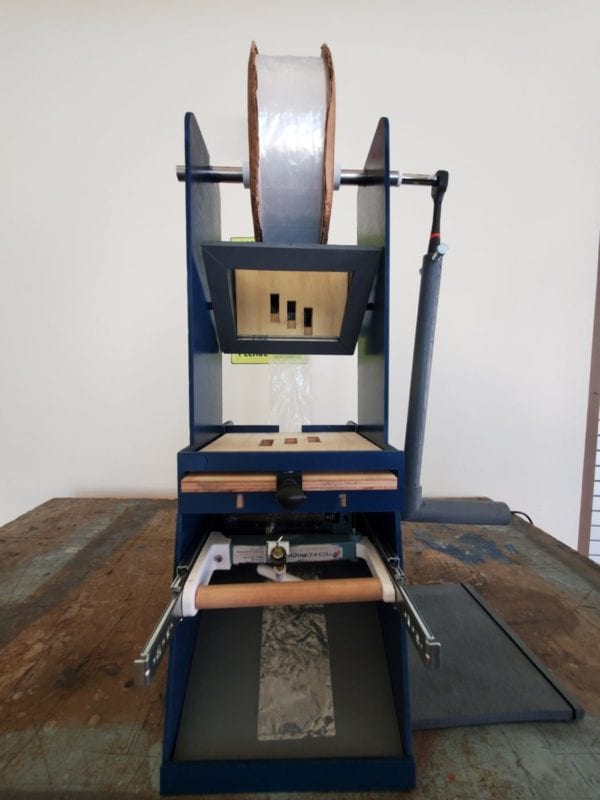
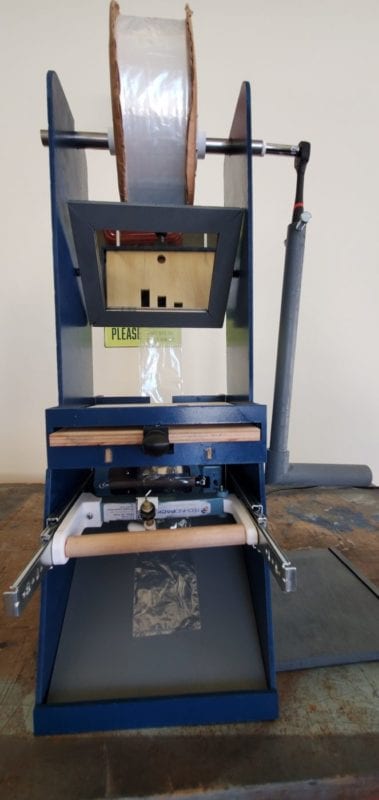
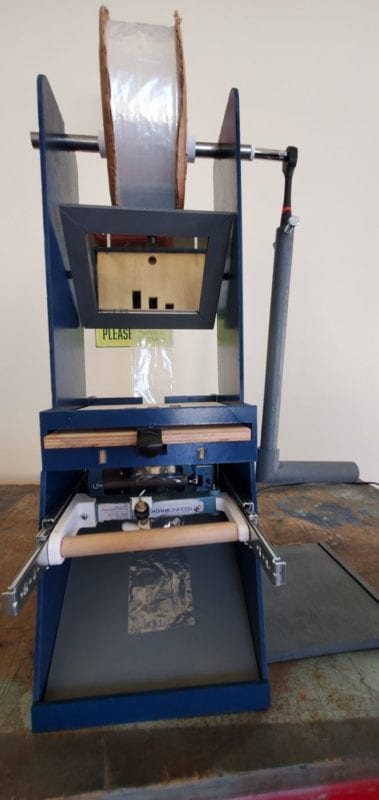
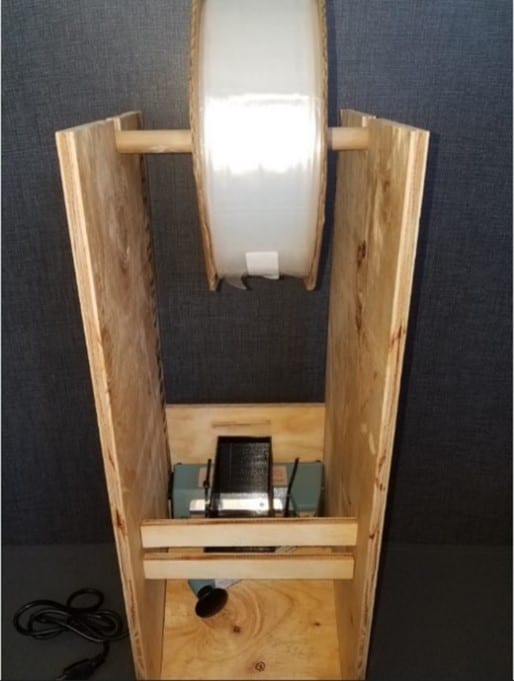
Workstation Design
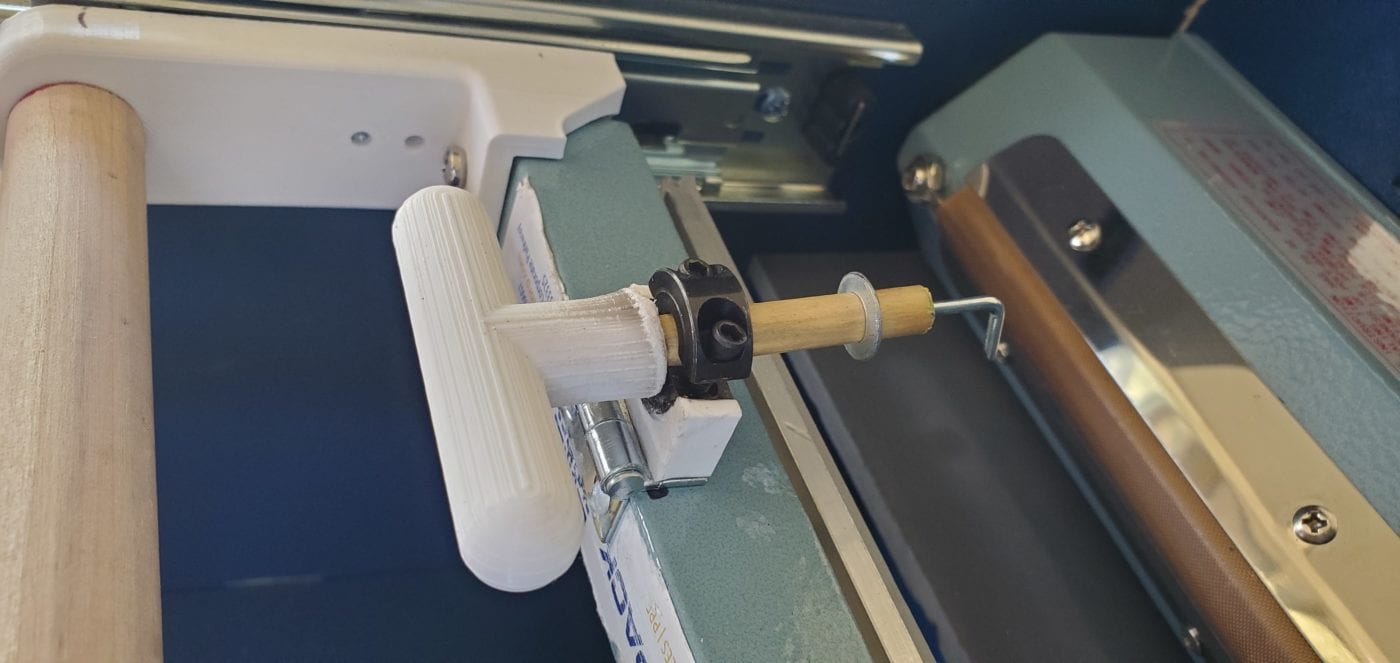
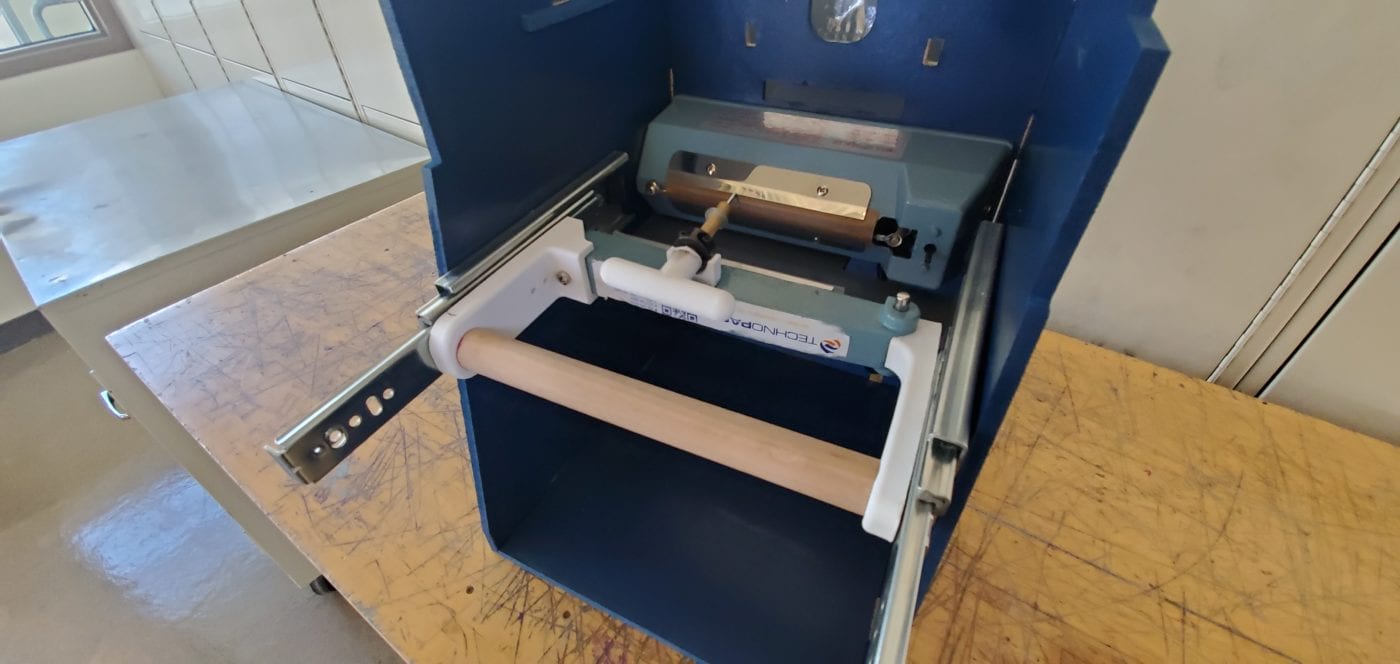
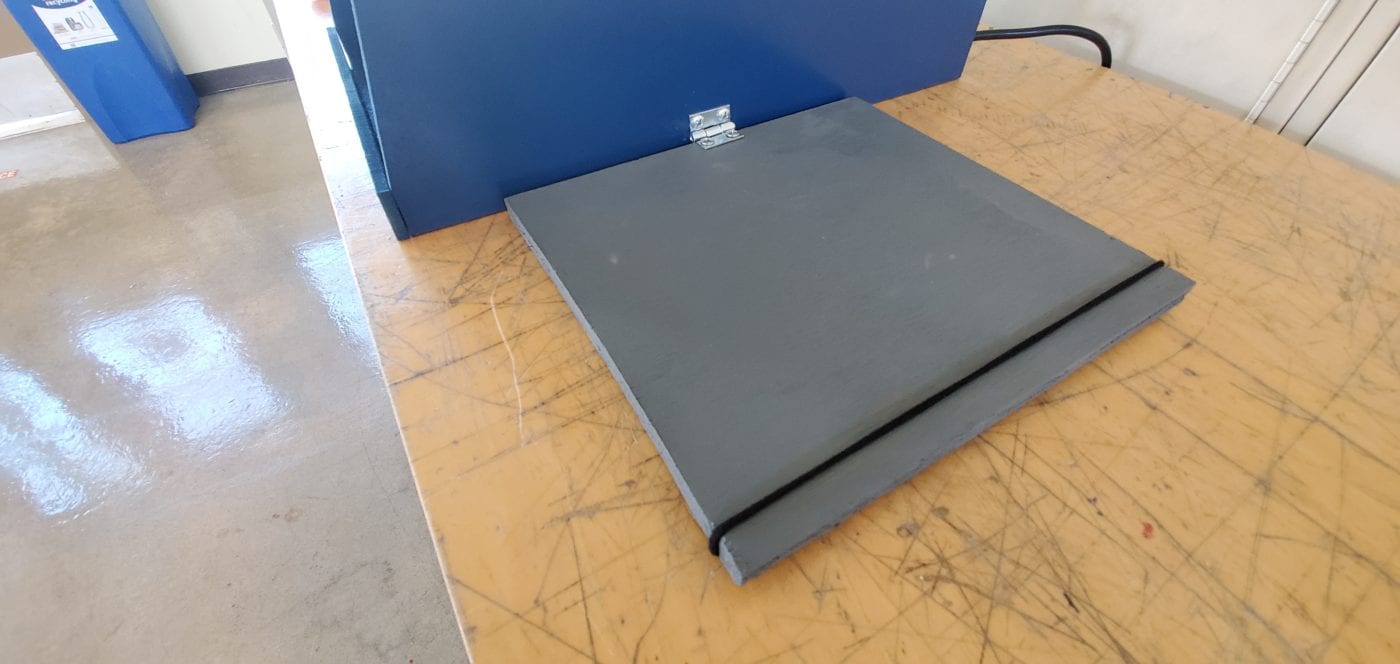
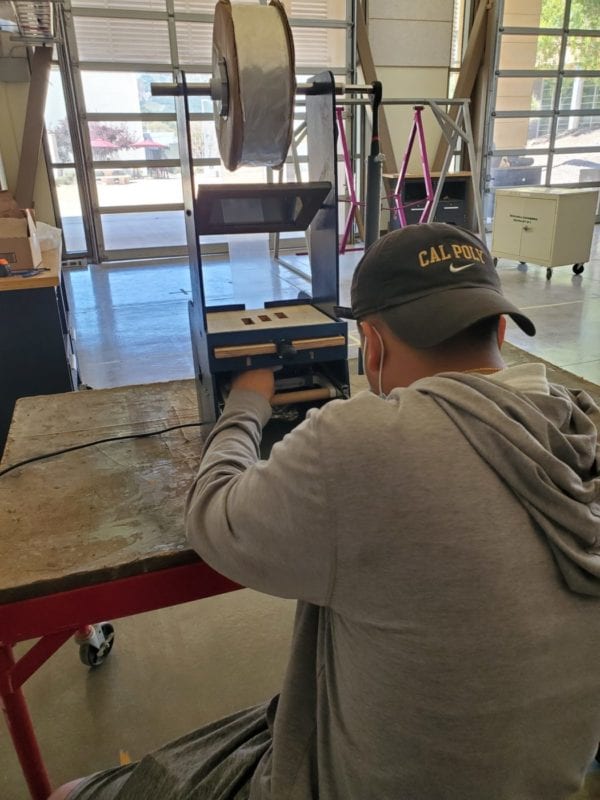
It incorporates a top-down workflow. The workstation consists of six subassemblies: sorting, bag holding, bag opening, heat sealing, user interface, and paper folding. They place the materials into the slots in the sorting templates. The user grabs the bag hooking handle from the bag opening system to actuate its hooks so that the individual bags open. The user then pushes in the heat sealer handle to seal and cut the individual bags. The user can then pick up the bags, place labels on them, and put them into the large funnel to the right where all the individual bags and paper instructions get consolidated into a final bag. The final bag is dropped onto the scale where the weight is read and verified that the kit is made correctly. Finally, the process is repeated by pushing both crank handles to cycle the bags.
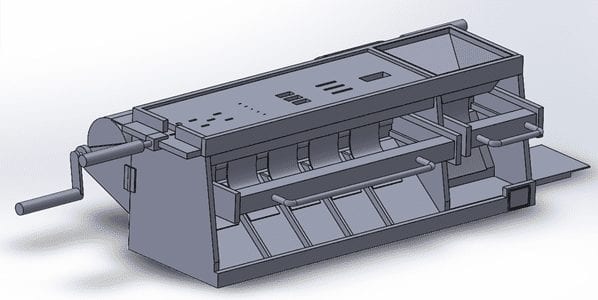
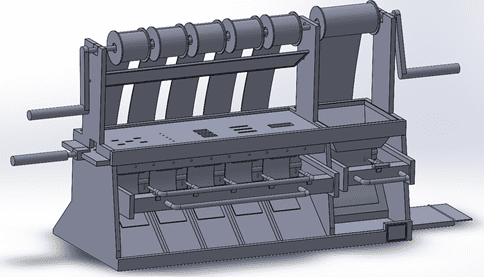
Design Concept
A
B
C
D
E
F
(A) – Initial sketched concept design of the kitting workstation.
(B) – First version of the workstation CAD model.
(C) – Second version CAD model with reduced height so that users can sit down.
(D) – Third version CAD model redesigned so that users can sit down and bags can flow to the workstation with the help of gravity.
(E) – Fourth version CAD model redesigned to match the size of the real bags.
(F) – Fifth version CAD model redesigned to have slots so that the housing is easily attached and detached for easier assembly.
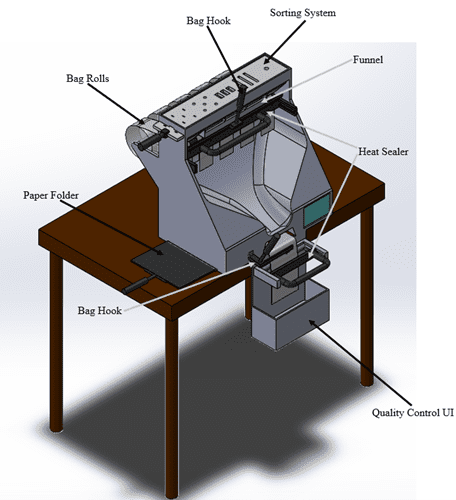
Final CAD model
This is our final CAD model that has been changed throughout the quarter through testing and feedback.
This design challenge was brought to us by SourceAmerica.
Design Verification
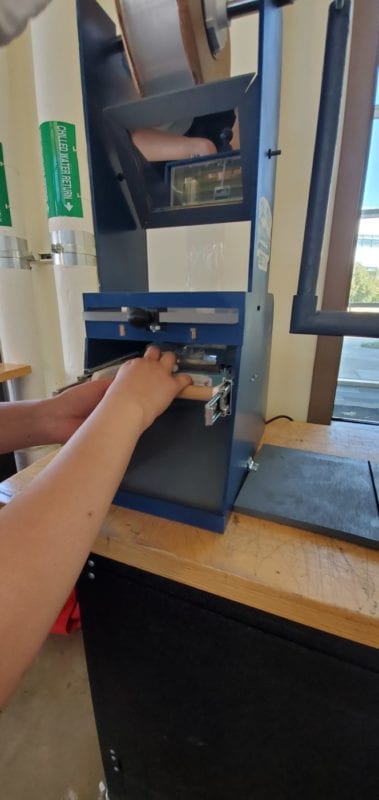
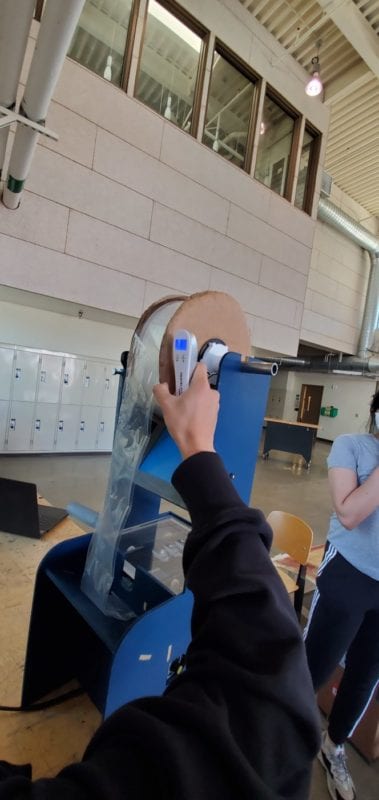
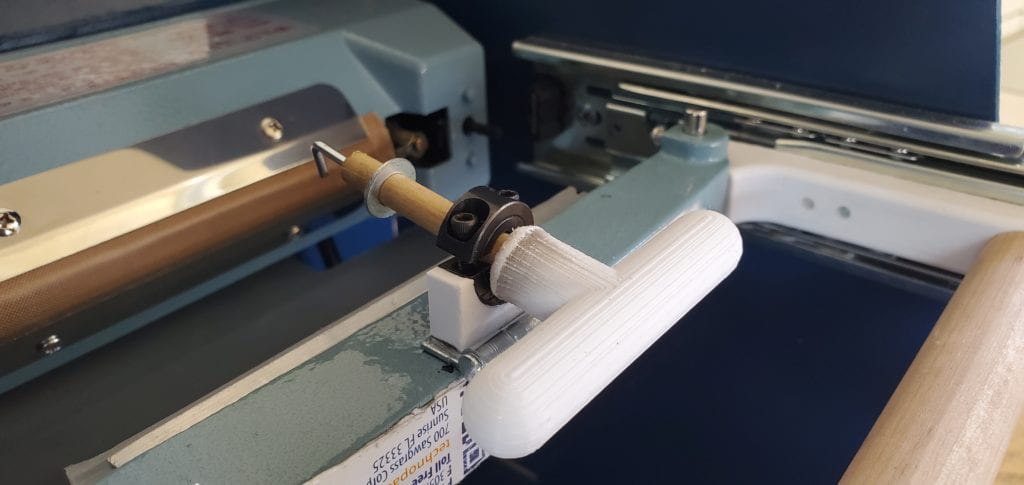
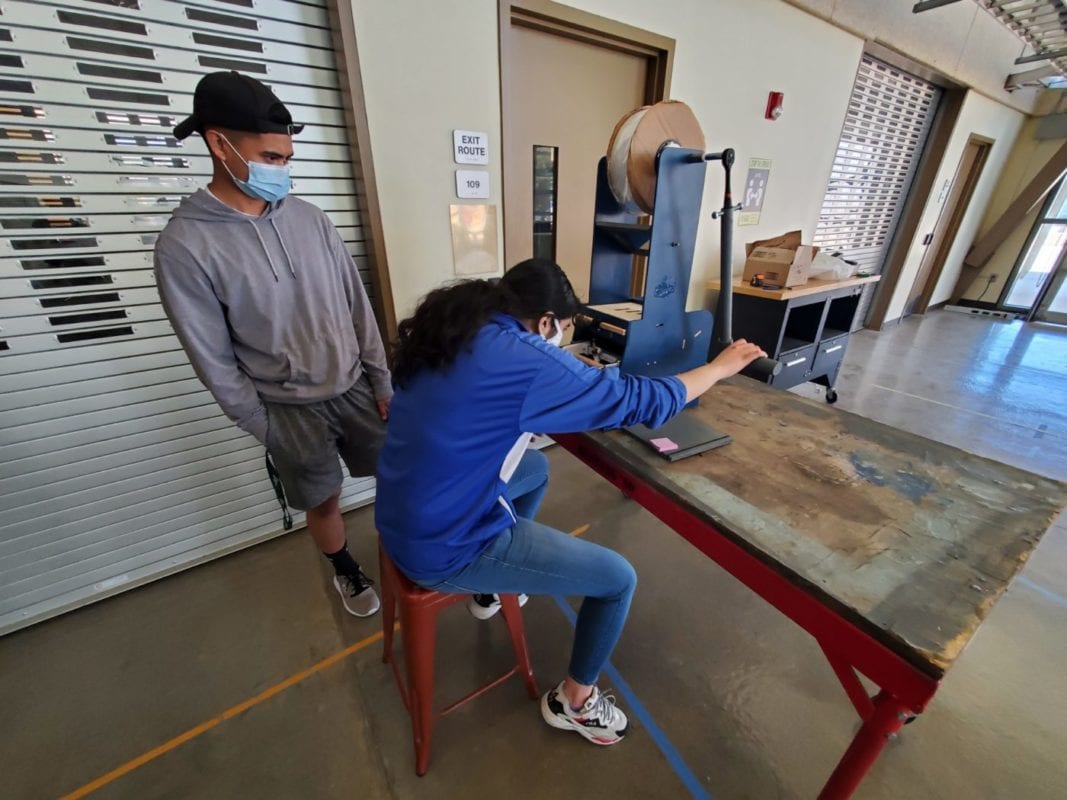
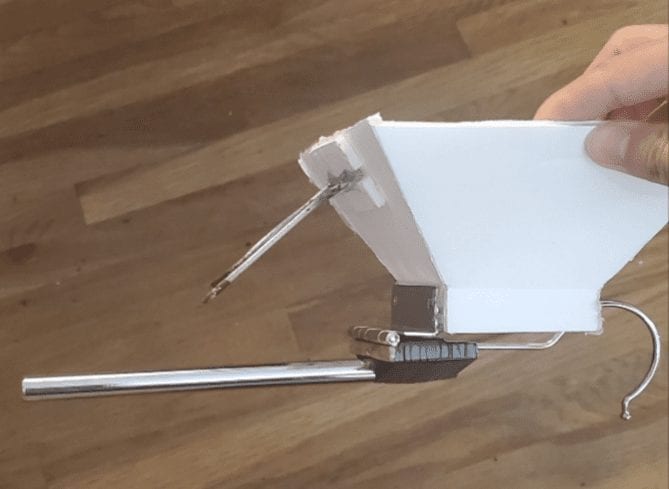
In the image above, one of our team members is operating the hooking system to conduct our hooking test. A ruler was used to measure the distance between the bottom of the ramp and the bottom of the poly bag to locate the ideal positioning of the bag for the hooking system to work properly.
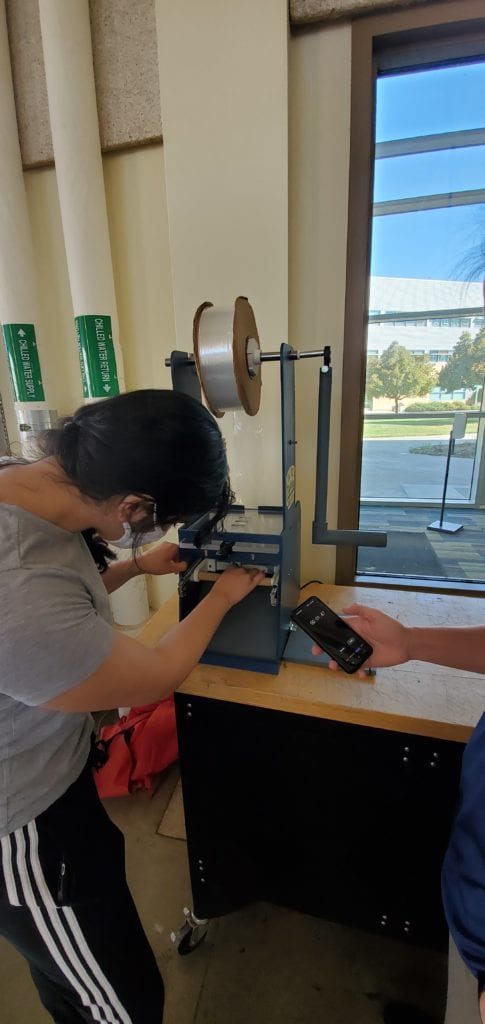
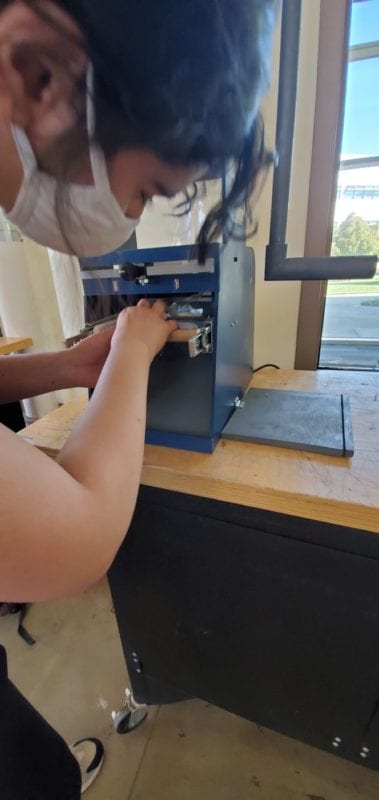
In the image above, the tipping test is being conducted by pulling on the bag holding shaft using a baggage weighing scale. The weighing scale allows us to measure the applied pulling force on the shaft. This was also done on the heat sealing handle.
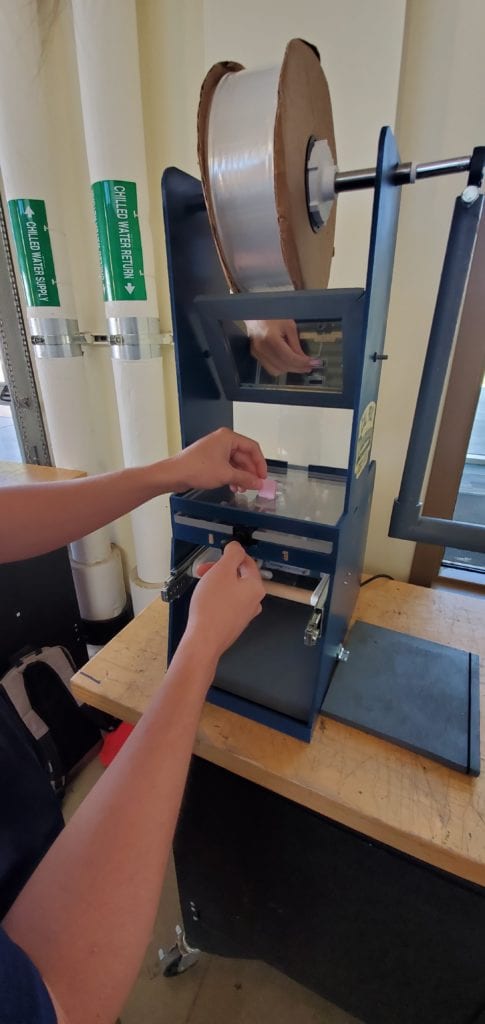
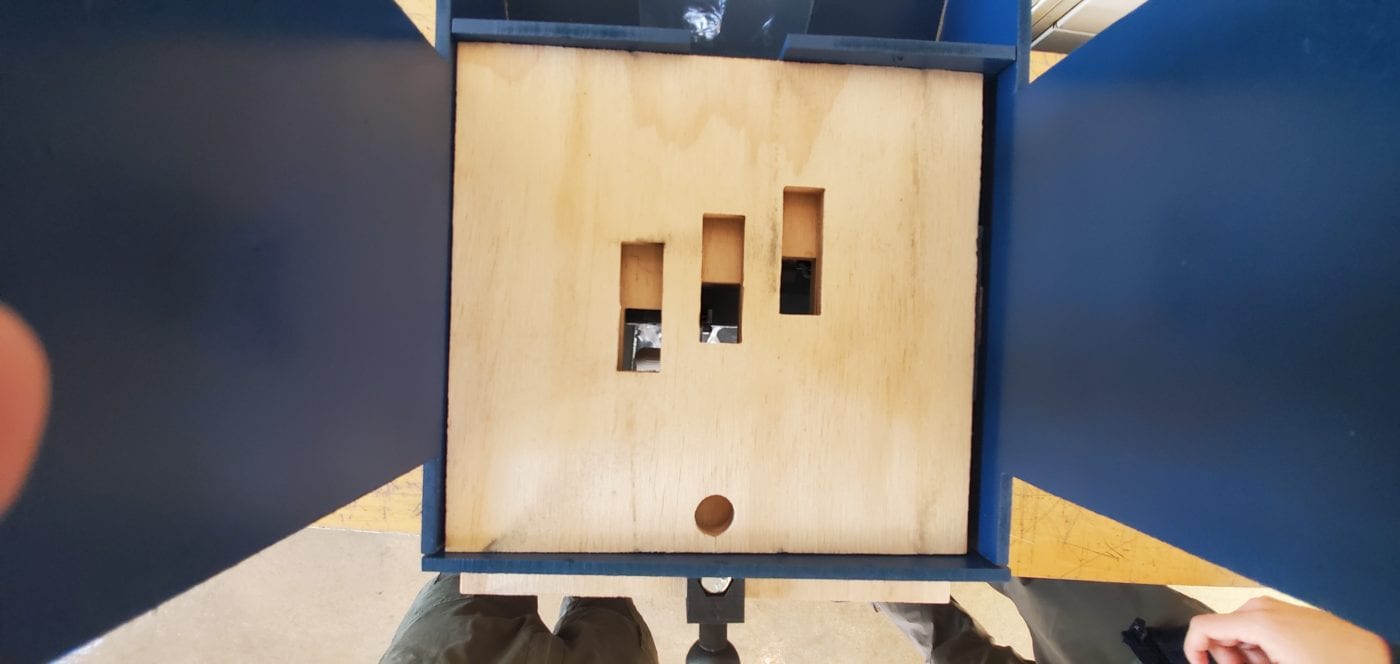
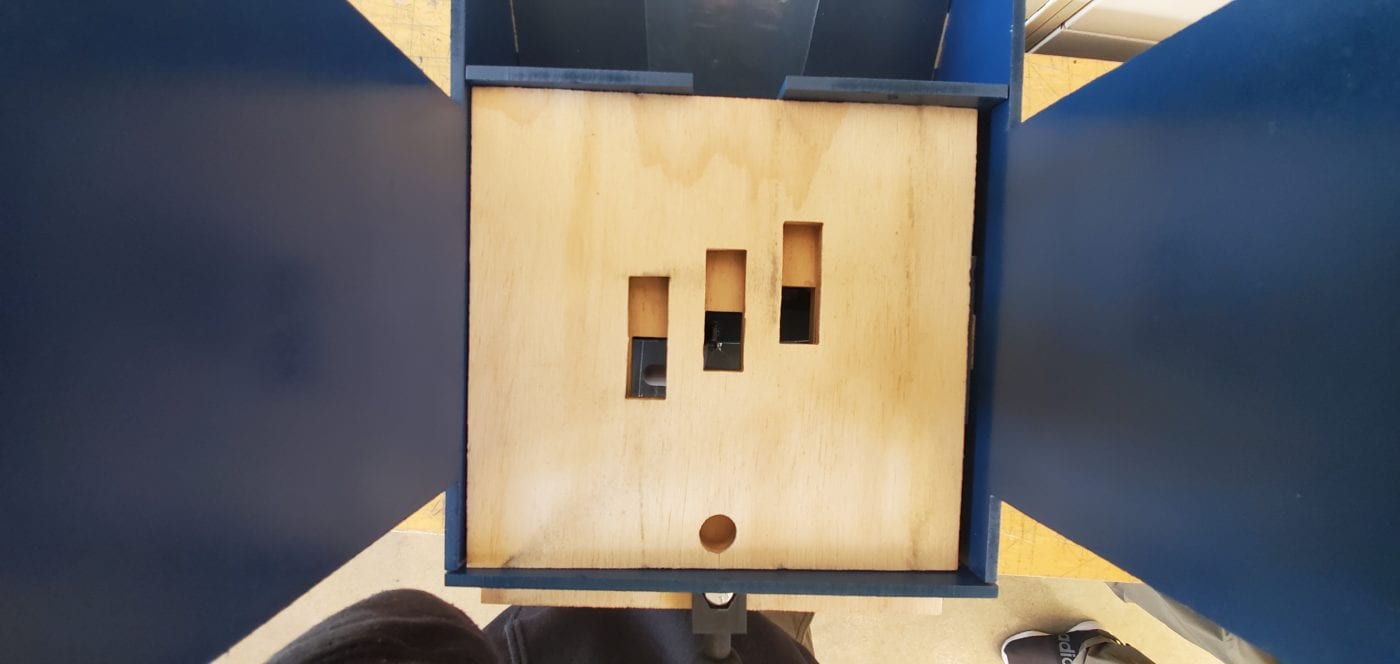
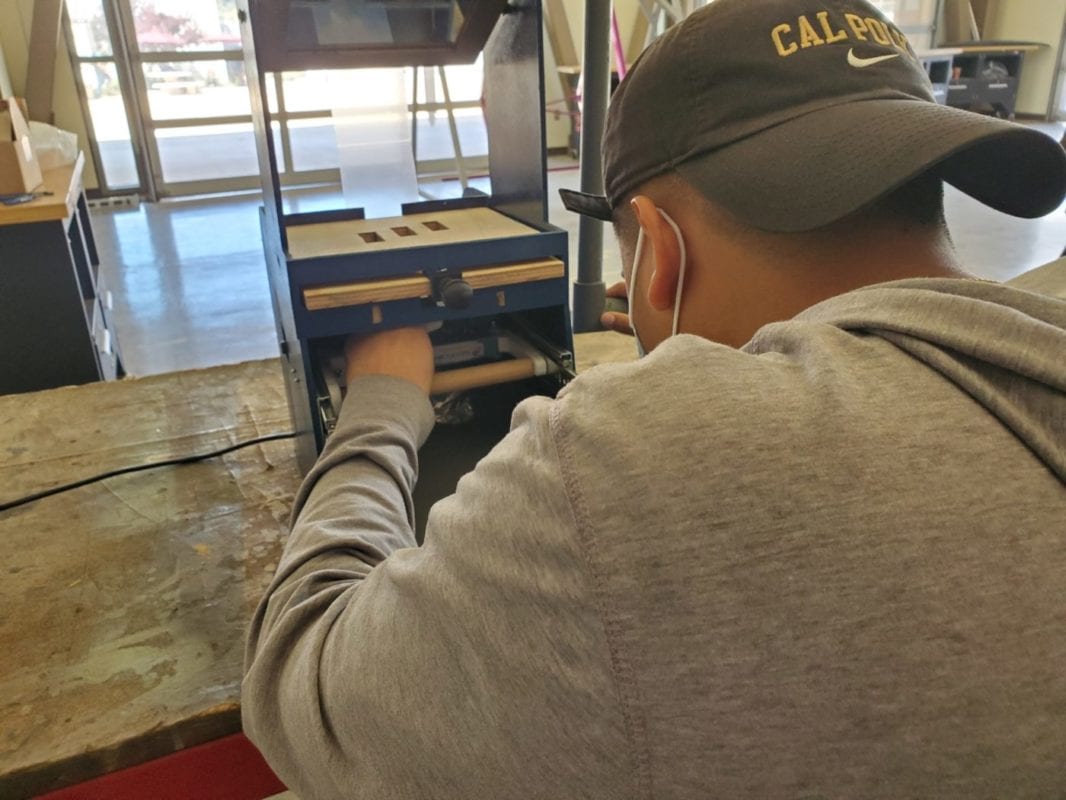
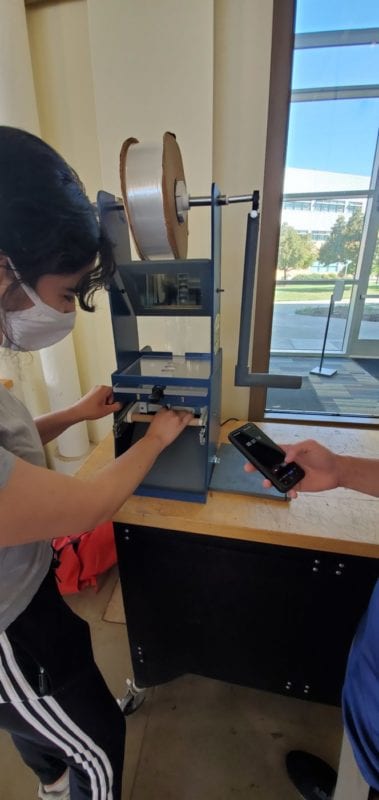
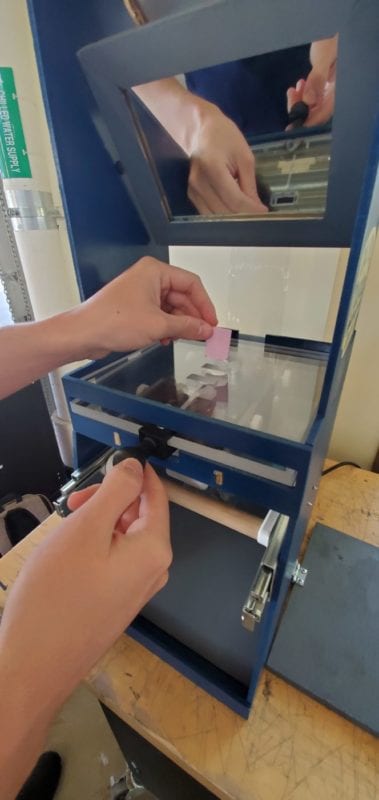
In the image above, the sorting test is being conducted by inserting a mini post-it note into one of the holes on the sorting template. There are three holes on the prototype’s sorting template. We tested how smoothly the item can fall through the sorting templates for each hole.
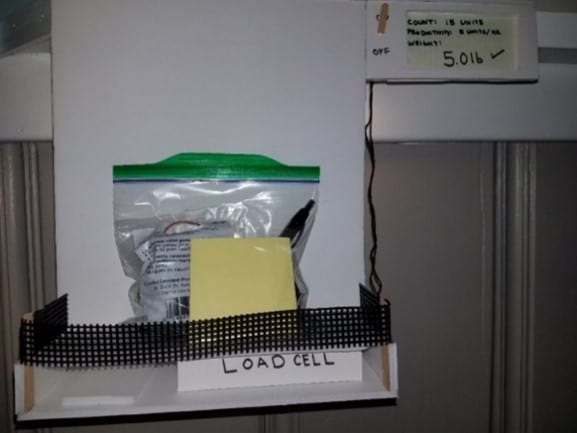
In the image above, the manual portion of the efficiency test is being conducted. For the efficiency test, we compared the kitting times between operating the workstation and manually kitting the item.
In the image above, the comparative dexterity test is being conducted. This test measured the kitting time when operating the workstation with certain impairments (i.e., one eye, one arm, or wearing thick gloves to resemble a lack of dexterity). The results contradicted our initial theory that any impairment would increase the average kit time for the user. However, this is due to the learning curve that set in, which was gained from our multiple trials with the workstation.
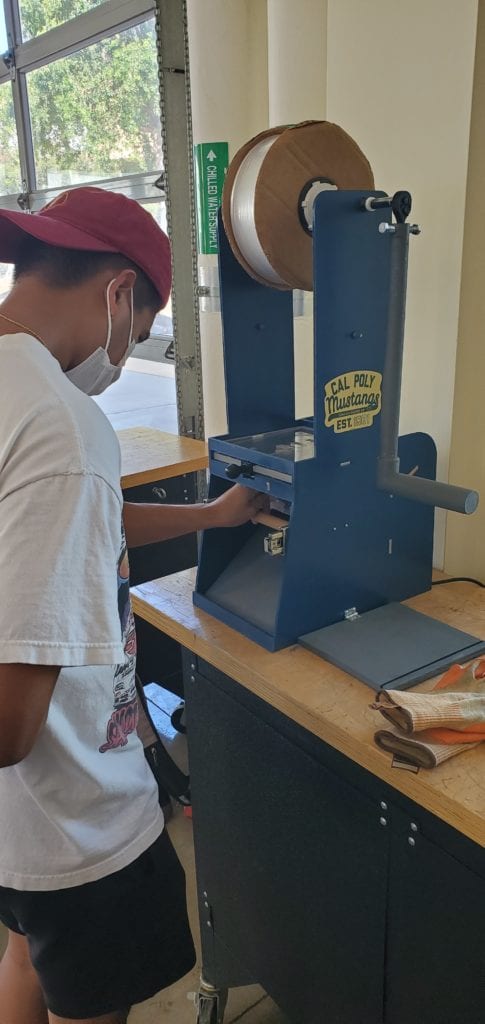
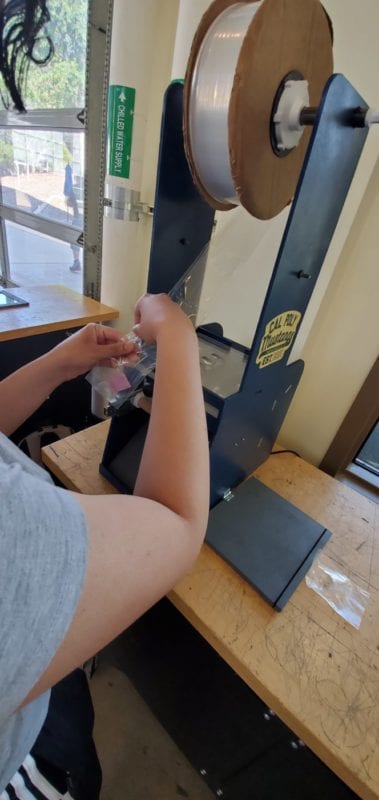
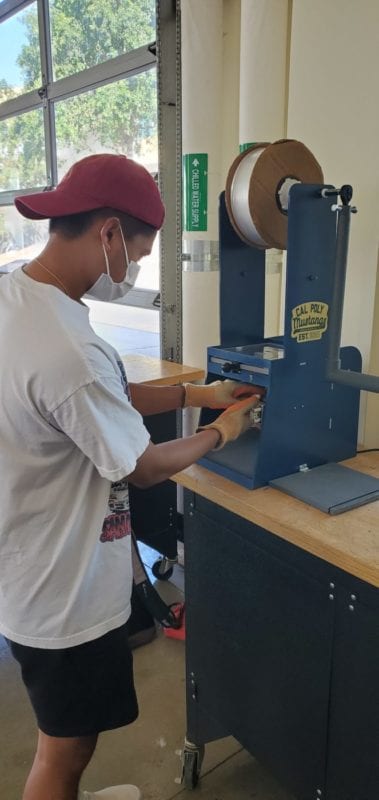
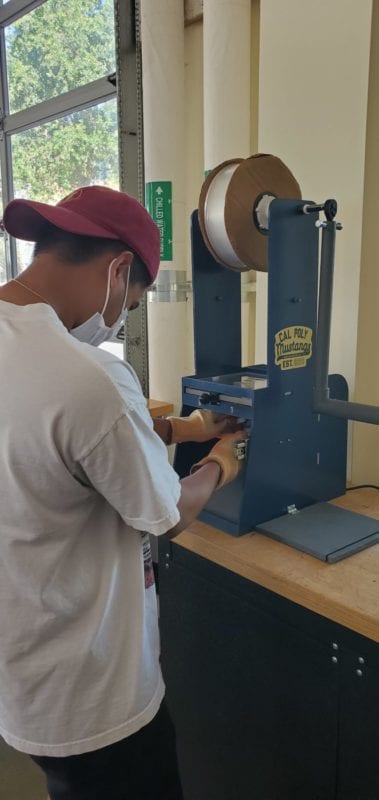
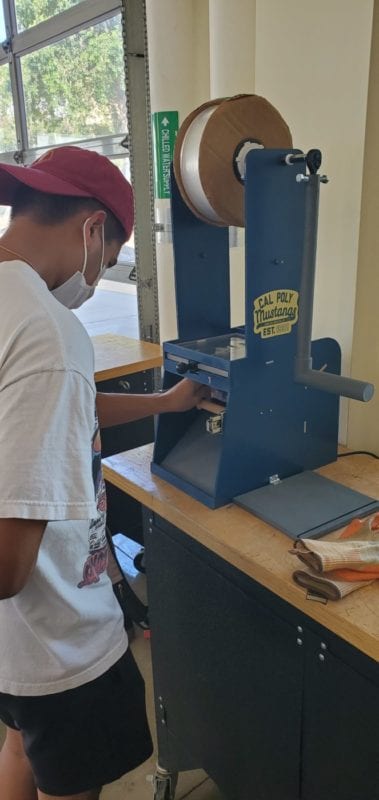
In the image above, the heat sealing test is being conducted to find the ideal heat sealing setting for optimal heat sealing. There are eight different knob settings on the heat sealer that indicate different heating levels. We observed the quality of each heat seal for each setting, while making sure that the bags did not melt onto the heat sealer.
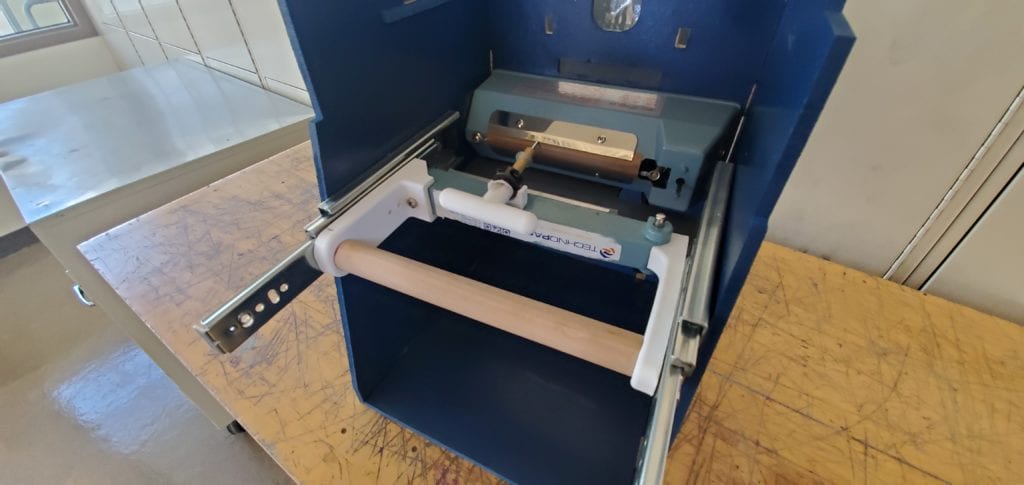
Prototype Workstation Manufacturing Process
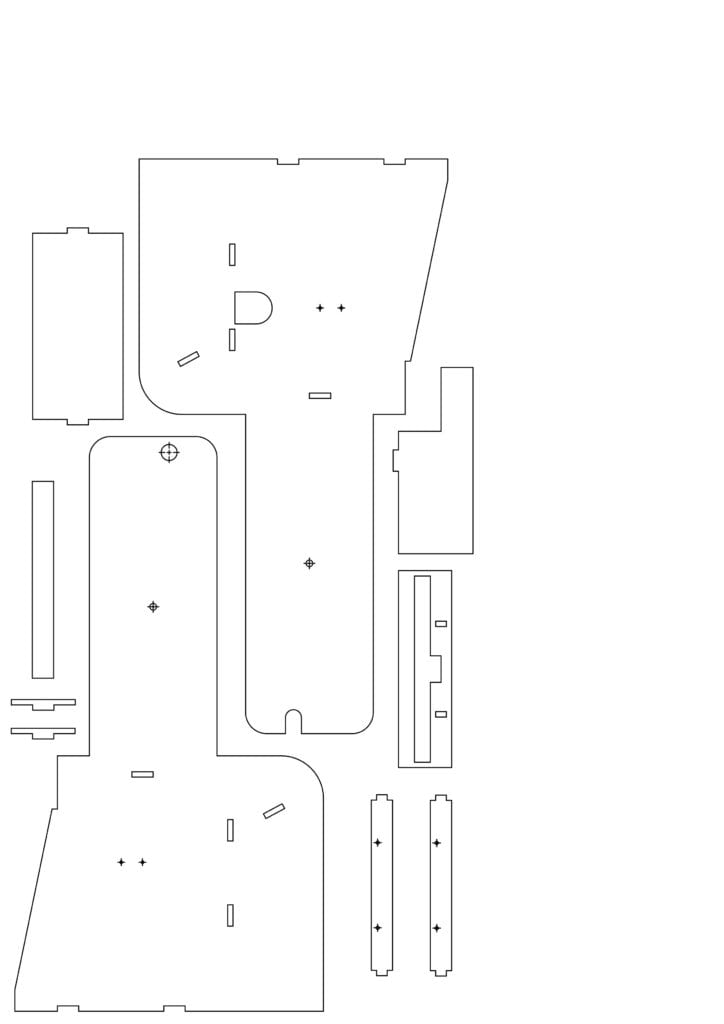
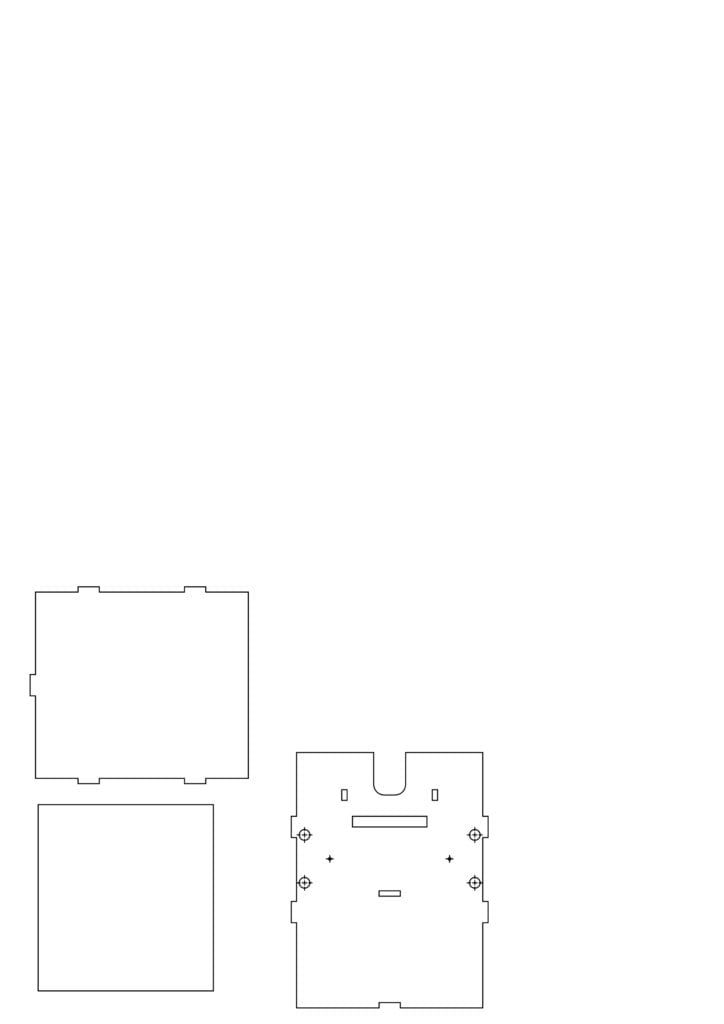
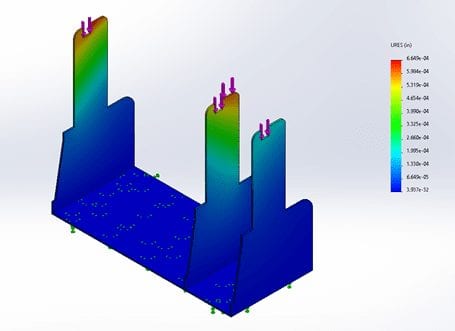
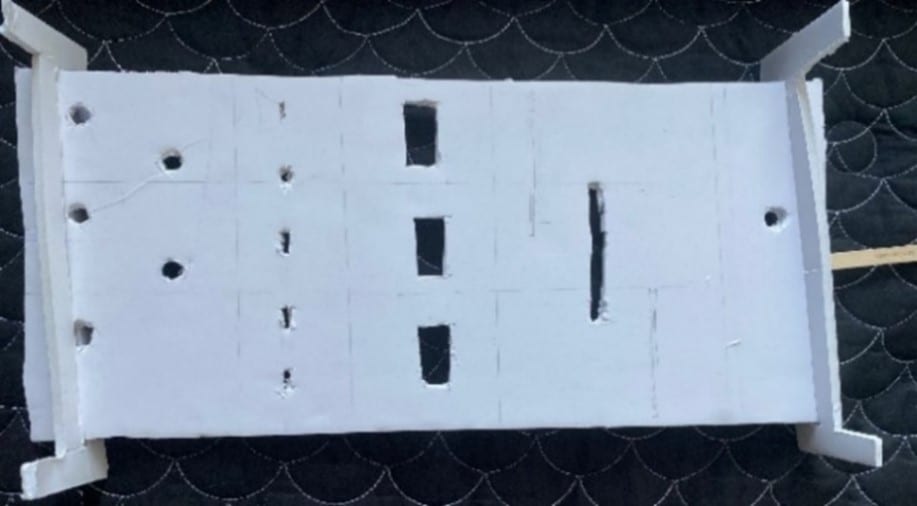
Most of the system components are procured and 3D printed. There are some modifications to the procured items such as the heat sealer. The housing for the verification prototype is manufactured from waterjet cutting in Mustang 60.
The pictures shown above are our DXF files for the housing that were sent to Mustang 60 for waterjet cutting.
Final Prototype Design
Custom Components
Sorting Templates
Mirror Frame
Paper Folding Board
3D-Printed Bag Driver
Ratchet Extender
Ratchet Extender Handle
Push Rod Assembly
Housing Walls
Sorting Template Handle
Hex Slots
3D-Printed Small Funnel
3D-Printed Hooking Handle
Stock Components
Poly Bag Rolls 3×4
Ratchet
Mirror
Drawer Railings
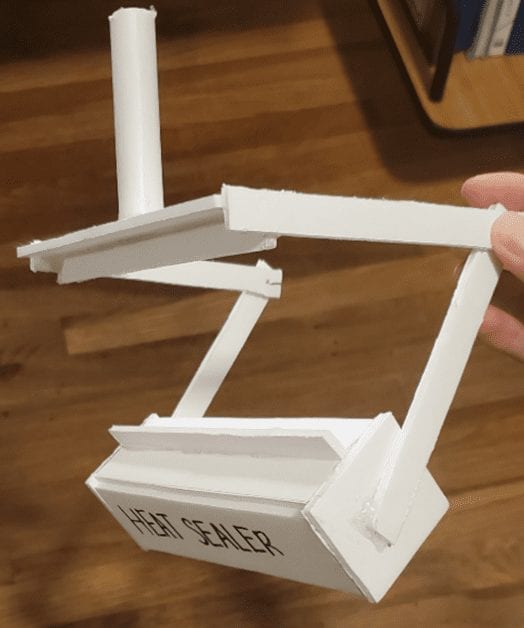
Heat Sealer
L-Shaped Hook
Dowel in Bag Opening System
Hinges
Grommet
Clamp Collar
Screws for Hinges
Future Applications
After testing, we decided to stop any further progress on the design due to time constraints. However, we did include potential revisions/solutions to many of the flaws found during testing. Since all members of our team are graduating, we would not be able to physically carry out the revisions ourselves. With that said, at this moment, we do not have any plans to pursue this design any further.
Future Manufacturing Recommendations
To begin, the ¼” particleboard we cut the housing walls from are too thin for the two load-bearing side walls. We recommend cutting those two pieces out of ½” wood to support the weight of the bag rolls without buckling. For the sorting system, there seemed to be issues with binding when the lower plate rolled over the wheels. To remedy this, we recommend adding additional vertical tolerance (+.25”) to the slot cut in the housing which would promote a more fluid movement for the template and the handle. For the bag opening system, we chose a clamp collar to facilitate the inwards, sliding motion of the hook. For future iterations, we recommend using a linear bushing instead which should help facilitate motion better. Our final recommendation would be to paint the pieces of the workstation. This step was not a part of our original design, but after receiving the watercut parts back, we saw that it resulted in stains and a dusty finish to the particle board. The paint not only improves the overall aesthetic of the workstation, but it creates a smooth surface finish and creates additional layers of protection for high-wear parts like the handles, bag ramp, and paper folding plate.
Send an email to pschuste@calpoly.edu to be connected with the project team. Please include the title of the senior project you’re inquiring about in the subject line.
Interested in Sponsoring a Mechanical Engineering Senior Project?


